Quantcast
Channel: Microscope World Blog
Viewing all 422 articles
Browse latest View live

Bacteria Growth Rate Lab

$
0
0
In this science project for kids, the student will examine the nature of biological population growth, which typically follows a specific pattern. This begins with an initial "lag" phase where there is little increase in the number of individuals. After a fairly short lag phase, there is a rapid exponential growth phase that is typically short-lived. Most populations then reach a stable phase where if nutrients are available, the population with fluctuate at a steady level.

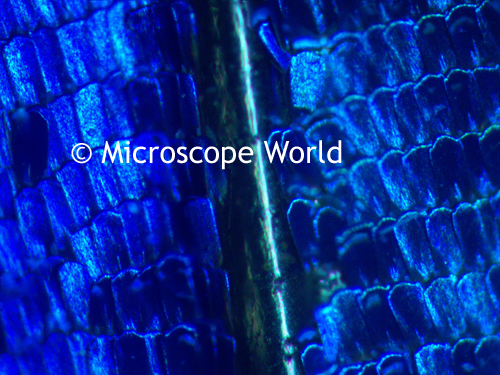
Bacteria captured with a digital biological microscope.

For this lab exercise, typically the teacher grows cultures and takes images with a document camera or the students can grow their own cultures and capture images with the camera or with a student microscope.

Activity 1: Setting Up & Recording Bacteria Growth

  1. Wear safety goggles and gloves at all times.
  2. Prepare sterile Petri dish with proper agar or nutrient source according to instructions usually provided by bacterial provider using aseptic techniques.
  3. Sterilize the bacteriological loop, and then inoculate the agar with the bacteria or provide prepared agar to give the students in a Petri dish.
  4. Note the time on the bottom of the dish.
  5. Focus with the document camera on the Petri dish and capture an initial image.
  6. Place the cover on the Petri dish, but do not turn it upside down.
  7. Use the document camera and set for recording a time lapse sequence of pictures.
  8. Focus the camera, so the entire radius of the Petri dish is in view.
  9. Have the camera take a picture every 30 minutes.
  10. Stop recording after 48 hours.

Activity 2: Measuring the Growth Rate & Graphing

  1. In each image of the growing bacteria, measure the diameter or approximate area of 3-5 colonies of bacteria on the plate. Average these for each time point.
  2. This measurement can be done with a metric ruler or with the calibration tool on the microscope or document viewer software.
  3. Record the average diameter or area of the bacterial colonies per time elapsed.
  4. Label the graph paper with time on the X axis and Colony size on the Y axis.
  5. Plot the average diameter of colonies in each frame on the time lapse sequence.
  6. With the recorded data, find an equation that describes the line or curve on the graph in the growth portion of the graph. Express the equation in both change in measurement (#s of bacteria) over change in time and also the natural log function.

Discussion Questions

  1. Does the plotted curve obtained match the predicted sigmoid curve of the normal growth model?
  2. What does the best fit curve look like? Does it provide new info about growth?
  3. Are the normal "lag", "log", and "stable" phases evident?
  4. What factors might cause all living things to basically follow this kind of growth curve, be they bacteria or elephants?
Have students prepare a lab report including the data, images and video to give a presentation to the class.

Flower Dissection Student Project

$
0
0
This student project requires use of a stereo low power microscope and a flower. Start by having students take a look at the diagram below in order to learn the parts of the flower.

Have each student carefully remove the following parts of the flower as shown above and place them under the stereo microscope. If your microscope has a camera built in, captures images to share with the class.

What do you notice about the following parts?
  • Sepals
  • Petals (carefully remove the petals from a simple flower leaving the inside stamens exposed).
  • Stamen (remove all the stamens, it consists of a filament (long tube) with a rounded anther (tip).
  • Filament
  • Anther (find the pollen grains on the anther and measure the length of one pollen grain in mm).
  • Pistil (remove the pistil, it consists of the style, stigma and ovary.)
  • Style
  • Stigma
  • Ovary (carefully split the ovary in half lengthwise).

Discussion

  1. How many sepals are present on your flower?
  2. How many petals are present on your flower?
  3. How many pistils are present on your flower?
  4. How many stamens are present on your flower?
  5. What is the length of the one pollen grain you measured and captured an image of?
  6. What is inside the base of the ovary?
Prepare a lab report including data, images and any drawings of the flower structure.

Monocot vs. Dicot Seed Science Project

$
0
0
In this kids science project different types of angiosperms will be identified, specifically between the monocot and dicot seed. Students will be able to view the differences in size, color and shape of the two seed types.

A monocot (monocotyledon) seed has a tiny embryo inside, but once the seed coat is removed the seed will not split in half to reveal the embryo. There is only one cotyledon that is very thick and does not store food. The food is stored right around the embryo in a monocot seed. A corn kernel is a perfect example of a monocot seed. A dicot seed has a tiny embryo inside, but it is tucked in between the two halves of the seed. Each half of the seed is referred to as a cotyledon, hence the name dicotyledon. The cotyledon is filled with food and nutrients for the embryo to develop. An example of a dicot seed is the lima bean.

Take corn kernels and lima beans and soak them for 24 hours before starting this project in order to decrease the days of germination (3-6 days).

  • Ask students to compare these two seeds and which they believe will sprout first. How many days do they think it will take to sprout?
  • Place a paper towel in the Petri dish and add water until it is damp.
  • Place the lima bean on the left side and the corn kernel on the right side of the dish.
  • If you have a document camera, set it up and start time lapse recording to collect data.
  • Observe the sprouts several times during the growth phase and note how the monocot and dicot differ.
  • Prepare your documentation and report your findings.
Dicot captured with the MW1-HD2 digital student microscope.

Monocot captured with the DCM2.1 microscope camera.

Polymers Under the Microscope

$
0
0
Viewing polymers under the microscope does not usually require a large amount of magnification. Below are some images Microscope World captured of polymer threads under a stereo microscope. Using a clear glass stage plate and light from both above and beneath the sample, the polymers were clearly visible.

10x magnification using only the top light on the stereo microscope.

HSZ6-TBL stereo microscope used to capture polymer images. This stereo microscope includes both a top and bottom LED illuminators.

30x magnification using both the top and bottom lights.

Fine polymer fibers captured at 40x magnification using the top light only on the stereo microscope.

Microscopes and Industry

$
0
0
One of Microscope World's customers manufactures blood test strips for patients who need to test blood sugar levels, among other things. During the manufacturing process it is important to view some of the test strips for quality control.

Blood test strip captured with the SMZ-168 stereo microscope.

Stereo microscopes are commonly used for quality control in manufacturing and industry. If you have a particular application and wonder if a microscope might help streamline your quality control process, don't hesitate to contact us for a free consultation.

Quartz under the Microscope

$
0
0
Quartz is the second most abundant mineral found in the Earth's crust, after feldspar. There are many varieties of quartz, some of which are semi-precious gems.

Quartz image courtesy JJ Harrison.
Pure quartz is colorless and clear. Other varieties include Citrine (pale yellow to brown in color), rose quartz (pink) and Amethyst (bright to dark or dull purple in color).

Quartz image captured with the MW1-LD2 digital handheld microscope.

Safety Pin Under the Microscope

$
0
0
There are a number of different items that are fun to view under at stereo microscope. If you just walk around your house or outside in the yard you can come up with many options for viewing.

Microscope World most recently had a safety pin handy, so this was thrown under the HSZ6-TBL stereo microscope in order to check out the microscope's clarity and reflection characteristics. (Often metal objects will reflect light differently under the microscope depending on the type of light being used).


Tip of the safety pin at 40x magnification.

80x magnification. Images captured with the DCM2.1 Microscope Camera.

Polarizing Microscope Applications

$
0
0
Polarizing microscopes are used for specialized medical and industrial applications, such as identifying crystals or fibers suspended in liquid, identifying minerals in core samples and detecting defects in semiconductors.

 Gypsum captured at 400x magnification under the MT9300 polarizing microscope.


Polarizing microscopes are used for toxicology, chemistry, pharmaceutics, medicine, the pulp/paper industry, and forensic medicine. They can also be utilized in finding stress points in metal, glass and other materials.

 Vitamin C captured at 400x magnification under a polarizing microscope.

Sugar captured at 100x magnification under the polarizing microscope.

Because polarizing microscopes use a polarizer and an analyer to affect the light passing through the microscope, often the images produced are brilliant in color.

Viewing Zebrafish Under a Stereo Microscope

$
0
0
Stereo microscopes offer low magnification and are perfect instruments for viewing zebrafish in the classroom. Stereo microscopes are sometimes referred to as dissection microscopes because they have a large amount of room to work under the microscope while looking through the eyepieces.

Viewing zebrafish under a dissecting microscope is a simple process. Start by setting your stereo microscope on a flat table with plenty of working room. When viewing stained zebrafish embryos, you will want to use the top (reflected) light source and place your specimen on a solid white stage plate.

Your zebrafish will most likely be in a petri dish. Center the dish under the microscope light and adjust the eyepieces so you will be able to look through the microscope comfortably. Start with the magnification at the lowest setting and bring the zebrafish into focus, then slowly increase the magnification. If you are unable to locate the zebrafish, move the petri dish slightly so a different part of the specimen comes into view - it can sometimes be tricky to initially get the zebrafish into the field of view.

When viewing the zebrafish with a stereo microscope you will see a three-dimensional round zebrafish. Because the zebrafish is not a flat object, there may be times that not all parts of the zebrafish are in focus at the same time. In order to view the other parts of the zebrafish in focus you may need to adjust the focusing knob slightly.

When finished viewing your zebrafish with the stereo microscope, turn off the light, return the zebrafish specimen to its proper location and place the dust cover back over the microscope to keep particles and dust from settling on the optics.

Video of zebrafish captured under the HSZ6-TBL stereo microscope.

Moina and Copepod under the Microscope

$
0
0
Moina thrives in ponds and reservoirs, but primarily inhabits temporary ponds or ditches. Moina is a genus that has the ability to survive in waters containing high salinity and other impurities, including salt pans.

Moina are primarily found in ponds or ditches. The males are smaller than females and the period to reach reproductive maturity takes four to five days at 26 degrees Celsius.

 Moina and Copepod image courtesy of Dave Wilson.

The image above was captured with a biological microscope. The Moina and Copepod were captured in Australia by one of  Microscope World's customers.

Copepods are a group of small crustaceans found in the sea and nearly every freshwater habitat. Some species are planktonic (drifting in sea waters) and some are benthic (living on the ocean floor), while some may live in wet terrestrial places such as swamps, under leaf fall in wet forests, bogs, springs, ponds, damp moss or water-filled recesses of plants. Copepods are sometimes used as bioindicators.

Stereo Microscope Images

$
0
0
Finding fun things to view with your stereo microscope is easier than you might think. If you simply walk around your house or outside in the back yard you can find an endless supply of interesting samples for microscope viewing.

Here are a few images captured under the MW5-L5 stereo zoom microscope (10x - 40x magnification). This stereo dissecting microscope is used frequently in schools and sometimes for manufacturing inspection.

Printed holiday napkin.

Penny.

Flower.

Toffee-covered almond.

Wax shavings.

Rosewood.

Have any ideas of things you would like to view under the microscope? Or have some of your own microscope images you would like to share with us? Visit our Facebook page and share your images and ideas with us!

Feathers

$
0
0
Feathers have many functions including insulation from wet and cold. Birds often pluck feathers to line their nest or insulate eggs or their young. Feathers are used to control flight and sometimes feathers help camouflage against predators.

This is the feather that was used to capture the microscope images below. It fits in the palm of your hand.

Microscope World captured images of the feather at 100x magnification using the HSZ6-TBL stereo zoom microscope.

The 2 mega pixel microscope camera DCM2.1 was used to capture the microscope images.

Magnification was increased by using a C-Mount adapter with a higher magnification lens in it.


The feather patterns are beautiful under the microscope.

Collecting Microscopic Pond Life

$
0
0
Discovering a variety of microscopic specimens in pond water is a common biology experiment for students both young and old. Below are some tips that will help you collect and identify microscopic pond life under your biological microscope.

The easiest way to collect small pond life and organisms is to squeeze water from plants or pond scum into a container. Scraping growth from water plants or anything covered in green or brown growth will usually result in a high content of microscopic pond life.

A plankton net is best for free swimming planktonic species. A plankton net is a very fine mesh cloth with a small container at the end. The plankton net can be used to concentrate the material squeezed out of water plants as well.

Hydra captured under a biological microscope.

Hydra can be collected by putting duckweed or other waterweed into a glass jar full of water. Wait for several hours and the hydra can be found attached to the glass.
Keep your pond organisms in a shallow container. A large surface with only a copule of cm of water ensures there is enough oxygen in the water. If you wish to culture algae, cook some garden soil in water. After cooling, you can incubate it with the algae you want to grow.
Desmids are beautiful small algae most abundant in waters without too many nutrients or acid waters. Bogs are good collecting spots for desmids.
Amoeba are protozoa that often feed on material on the bottom sediment of a pond. The best method for collecting amoeba is to lower a jar upside down until it is positioned just above the mud surface. Slowly let the air escape so the top layer is sucked into the jar.
Diatoms captured with a student biology microscope.

When viewing brown growth scraped off surfaces, there is a good chance you will find diatoms.
The best way to view your microscopic pond life is by placing the sample on a depression slide with a glass cover slip. Put your specimen under the microscope and start with the lowest magnification. Once you bring the sample into focus, increase the magnfication. If you are having trouble identifying your specimen, send us an email with the image attached. We will be happy to try and help you determine which microscope pond life you have come across!


How to Study Insects Under the Microscope

$
0
0
Insects are perfect specimens to examine closely under the microscope. Typically a low power stereo microscope is best for viewing insects because it will provide a 3D image.

  
Ant as seen under a dissecting microscope.
Bald faced hornet under the stereo microscope.
Once you view the insects under a dissecting microscope, you may wish to view more details of a specific part of the insect. If this is the case, you will need to dissect the insect and prepare a slide. This will allow you to view a flat specimen under a biological microscope, which has more magnification. You also need to prepare a slide because when using a biological microscope the specimen must be translucent (allow light to pass through it). A stereo dissecting microscope has light above and beneath the stage, whereas a biological microscope only has light that shines up from beneath the stage.

Prepared slide of a bee under a biological microscope captured with the DCM2.1 microscope camera.
If you are just starting to view insects with the microscope and only have access to one type of microscope, it is recommended to start with a basic dissecting stereo microscope, as these are easier to view the entire insect at once and do not require slide preparation.

How to Adjust the Microscope Condenser

$
0
0
It is common for beginner microscope users to incorrectly adjust the condenser on their microscope. The condenser is located beneath the stage on a biological microscope or a polarizing microscope and controls the amount of light that passes from the illuminator, up through the stage and the specimen. The microscope condenser regulates the intensity of the light by closing or opening the condenser diaphragm or by adjusting the height of the condenser.

Microscope condenser
Microscope condenser from a polarizing microscope.
When using the microscope the light should not be adjusted using the condenser (this is a common mistake). Use the intensity control on the light to adjust brightness of the lamp. If you try to adjust the light coming through the microscope by closing the condenser diaphragm it diminishes the resolution of the microscope. Always open the diaphragm on the microscope condenser as wide as possible while still achieving a good image. To achieve sufficient contrast it should be closed just slightly - a good rule is to have the condenser open to at least 2/3 maximum capacity. Better results are almost always achieved by placing the condenser in the highest position.

Butterfly under the Microscope

$
0
0
The butterfly is most active during the day and is an insect of the order Lepidoptera. The butterfly's life cycle consists of four parts: egg, larva, pupa and adult. Once butterflies reach the adult stage, they have four wings with tiny scales. These scales can be seen in the images below that were captured under a stereo dissecting microscope.

Butterfly wing, 100x magnification captured using the DCM2.1 microscope camera.
A butterfly's fore and hindwings are not hooked together, which allows the butterfly to fly more gracefully. After the butterfly emerges from its pupal stage it can not fly until the wings are unfolded.

Butterfly wing, 100x magnification under the HSZ6-TBL stereo zoom microscope.
A newly emerged butterfly needs to spend time inflating its wings with blood and letting them dry before it can first take flight. This wing-drying process takes anywhere from 1-3 hours, a time period that makes the butterfly quite vulnerable to predators.

Butterfly wing, 100x.
The color of butterfly wings is created by tiny scales. The blue color from this butterfly is created by the microstructure of the scales. This structural coloration is a result of coherent scattering of light by the photonic crystal nature of the scales. A butterfly's scales cling fairly loosely to the wing and come off easily without harming the butterfly.

A scanning electron microscope was used to capture the above image of an individual scale on a peacock feather at 1000x magnification. Image courtesy Wikipedia.

Fish Scales Under the Microscope

$
0
0
The skin of most bony and cartilaginous fish are covered in scales. Even eels have microscopic scales on them! Fish scales are produced from the mesoderm layer of the dermis, which distinguishes them from reptile scales. The same genes involved in tooth and hair development in mammals are also involved in scale development in fish.

Microscope World recently visited the fish market and purchased some fresh salmon to view under the HSZ6-TBL stereo zoom microscope. The images below were all captured at 100x magnification using the DCM2.1 microscope camera and microscope software. 100x magnification was reached by using a slightly higher magnification c-mount camera adapter.

Fish scales, 100x magnification.
Fish scales, 100x, notice the small droplets of blood.
Fish scales, 100x, darker spots.
All of the fish images were captured from the same piece of fish, notice how different some of the parts look, all at the same magnification under the microscope.

Skin Under the Microscope

$
0
0
Skin is the largest organ of the integumentary system in mammals. Amphibians, reptiles and birds have a different type of skin. Skin is a very important organ because it interfaces with the environment and is the first line of defense from external factors, including protecting the body against pathogens, insulating the body, temperature regulation and excessive water loss.

In humans the thinnest layer of skin on the body is found under the eyes and around the eyelids (0.5mm thick). The palms and soles of the feet contain the thickest layers of skin (4mm thick).

Thin layer of skin captured at 100x magnification under a stereo microscope using the bottom light for illumination only.

Human skin under the HSZ6-TBL LED stereo zoom microscope using the top light only at 100x magnification.

Another shot captured at 100x magnification using the bottom light. The microscope camera used to capture this image was the DCM2.1 microscope camera.

Top illumination only, 100x magnification.

Peacock under the Microscope

$
0
0
Peafowl are three species of flying birds in the genus Pavo from the pheasant family. These birds are best known for the male's colorful eye-spotted tail, which it displays while courting the female.

Photo: Jebulon
The male is called a peacock. The female a peahen (usually grey or brown), and offspring are peachicks.


All images captured at 100x magnification under the HSZ6-TBL stereo microscope using the DCM2.1 microscope camera. Magnification was increased using a slightly higher magnifying c-mount camera adapter.


Hair Repair under the Microscope

$
0
0
Microscope World recently had a customer who wanted to do some analysis as to whether their hair care serum was actually working. In order to test the product, single strands of hair needed to be tested under a high power biological microscope.

Photos of the same strand of hair that was tested before and after the hair serum was applied were captured using the  Digital BA210 biological microscope.

100x Magnification - before using hair serum.
100x Magnification - after using hair serum.
400x Magnification - before using hair serum.
400x Magnification - after using hair serum.
100x Magnification - before using hair serum.
100x Magnification - after using hair serum.
When viewing a single strand of hair under a biological microscope it is important to keep the strand of hair flat or at least pulled tight so that all surfaces of the hair are on the same focal plane, otherwise portions of the strand of hair will not be in focus.
Viewing all 422 articles
Browse latest View live