Quantcast
Channel: Microscope World Blog
Viewing all 422 articles
Browse latest View live

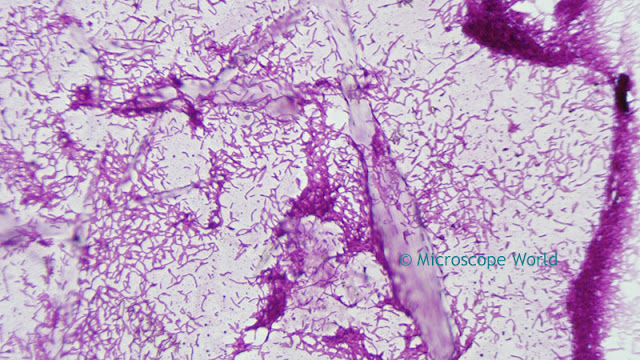
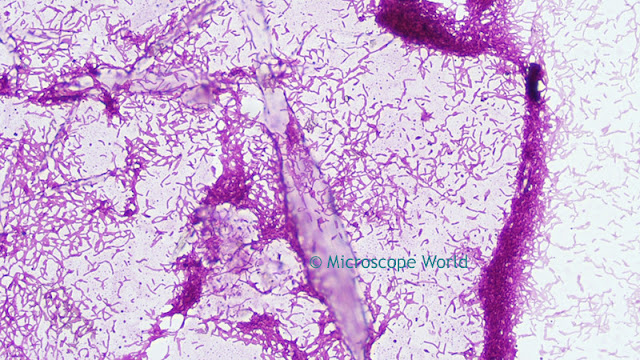
Microscopy Gram Staining

$
0
0
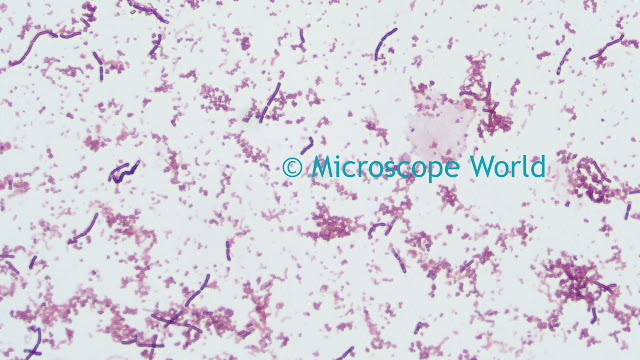
Gram staining (sometimes called Gram's method) is the method in which bacterial species are differentiated into two groups: Gram-positive and Gram-negative, making it a differential staining method. The name Gram Staining comes from the Danish bacteriology Hans Christian Gram, who developed the microscopy technique.

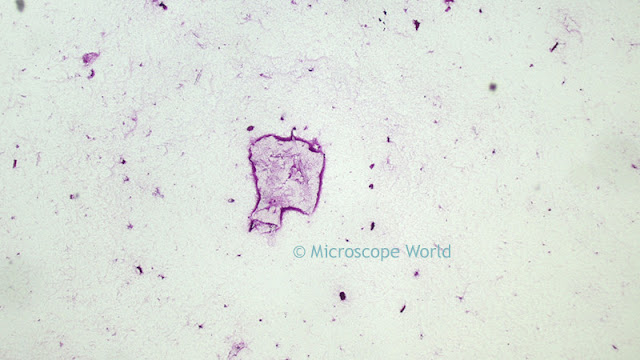
Gram staining differentiates bacteria by the chemical and physical properties of their cell walls and by detecting a thick layer of protein-sugar complexes called peptidoglycans, which are present in Gram-positive bacteria in a layer that makes up 60-90% of the cell wall. Peptidoglycans are present in the cells walls of Gram-negative organisms, but they only comprise 10-20% of the cell wall. In a Gram stain test, Gram-positive bacteria retain the crystal violet dye, while a counterstain (often safranin or fuchsine) added after the crystal violet gives all Gram-negative bacteria a red or pink coloring.

Gram staining is almost always the first step in the identification of a bacterial organism. While Gram staining is a valuable diagnostic tool in both clinical and research settings, not all bacteria can be definitely classified by this technique.

Image Courtesy: Y. Tambe
The image above shows both Gram-positive bacteria (in purple) and Gram-negative bacteria (in pink). The microscope image is of Staphylococcus aureus (Gram-positive, purple) and Escherichia coli (gram-negative, pink) and was captured under a biological microscope at 1000x magnification.

Gram stain of 3 types of bacteria captured under RB30 biological microscope at 400x.
Gram stain of 3 types of bacteria captured at 400x under the RB30 biological microscope.

The image above is of 3 different types of bacteria with a Gram stain applied to the prepared slide. The image was captured using a 40x Plan Fluor objective lens on the RB30 biological microscope.


Fruit and Flower Microscope Slides

$
0
0
The Fruit & Flower Prepared Microscope Slide Kit contains beautiful prepared slides that are ready to view under a biological microscope. This prepared slide set is the perfect gift for someone who already has a microscope, but might be looking for something new to view under their microscope. The Fruit & Flower Prepared Slide Kit contains the following prepared slides: (All images below were captured using the Richter Optica U2-D digital biological microscope.)

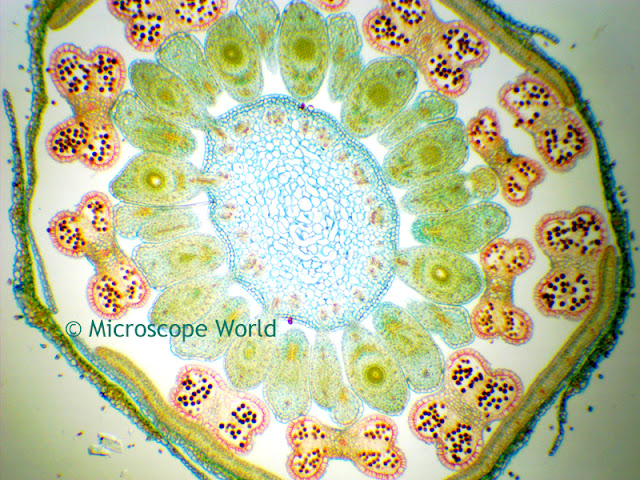
Microscopy image of cucumis staminate flower.
Cucumis Staminate Flower prepared slide under the microscope (100x)
The Cucumis Staminate Flower is better known as the stamen from the cucumber family, including melons.

Microscopy image of ranunculus under the microscope (flower).
Ranunculus prepared slide under the microscope (100x)
Ranunculus are a colorful flower group that includes buttercups, spearworts and water crowfoots.

Microscopy image of monocot and dicot at 40x.
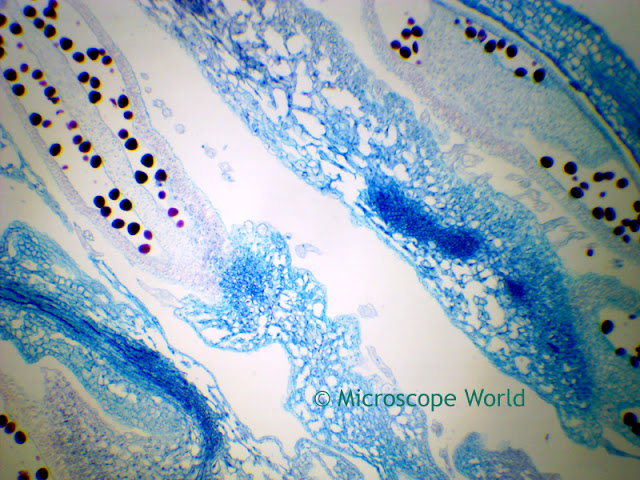
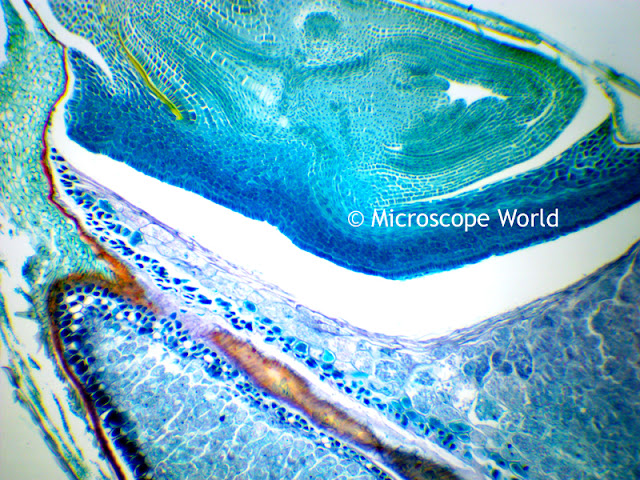
Monocot and Dicot of Flower Bud prepared slide under the microscope (40x)
Monocot and Dicot of flower buds are beautiful and typically product amazing colors in prepared microscope slides.

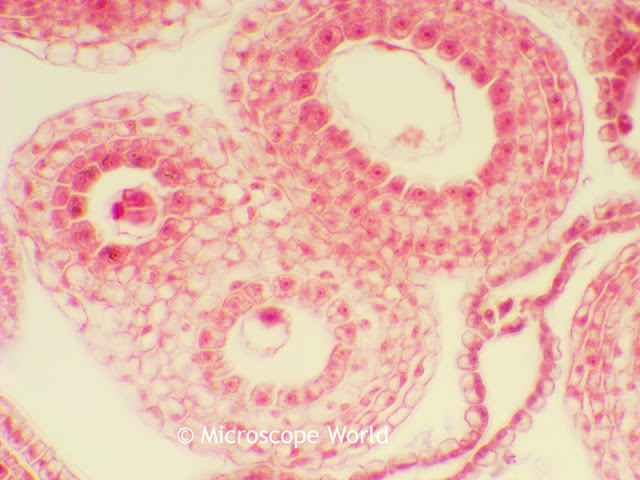
Capsella of bud microscopy image.
Capsella of Bud prepared slide under the microscope (400x)
Capsella of Bud is a mature embryo with Cotyledons. Capsella is a genus of herbaceous plants and biennial plants in the mustard family.

Microscopy image of wheat at 40x.
Wheat prepared slide under the microscope (40x)
Wheat is the third-most produced cereal grain in the world behind maize and rice.

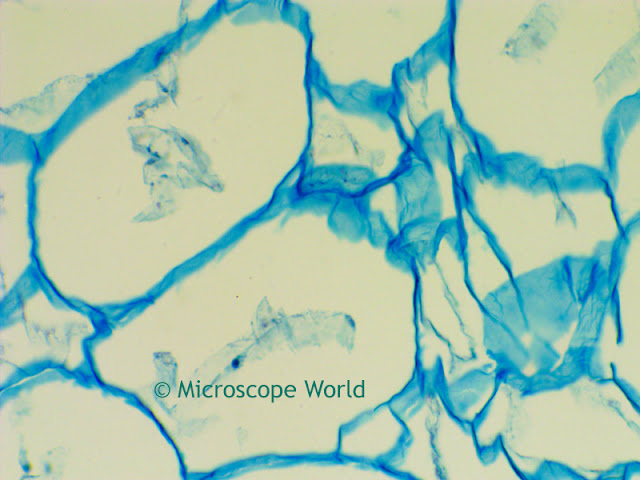
Microscopy image of pear at 400x.
Pear prepared slide under the microscope (400x)
Pears are grown both as an edible fruit and for the beauty of their ornamental trees.

Microscopy image of corn seed at 100x.
Corn Seed prepared slide under the microscope (100x)
Corn (also known as Maize) is a large-grain plant that is a monocot.

Microscopy image of pollen at 100x.
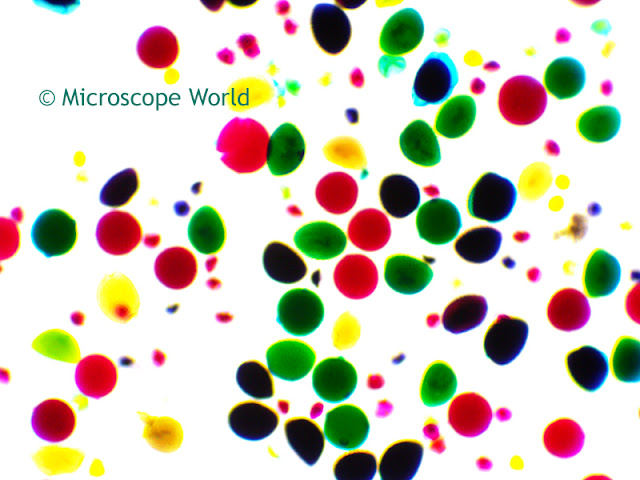
Pollen prepared slide under the microscope (100x)
Pollen is a fine to coarse powder that contains microgametophytes of seed plants, which produce male gametes. Pollen is involved in the reproduction of plants.

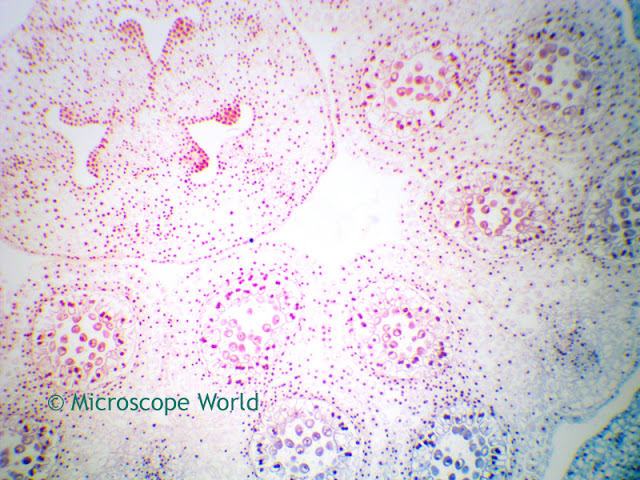
Microscopy image of Lilium at 40x.
Lilium prepared slide under the microscope (40x)
Lilium is a genus of herbaceous flowering plants growing from bulbs, all of which have large and prominent flowers (including Lilies).

Microscopy image of capsella at 100x.
Capsella prepared slide under the microscope (100x)
Capsella is part of the mustard family.

All the fruit and flower prepared slides shown above can be purchased in the Fruit & Flower Prepared Slide Kit from Microscope World. You can find alternative prepared slide kits here.

Live Blood under Darkfield Microscope

Bacteria Under the Microscope with Different Objective Lenses

$
0
0
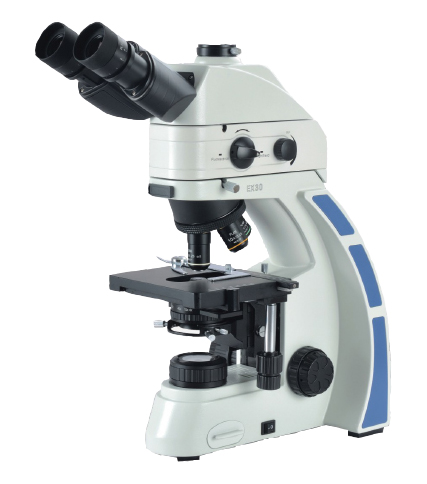
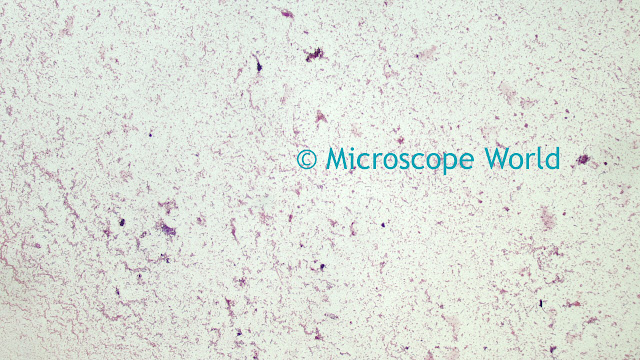
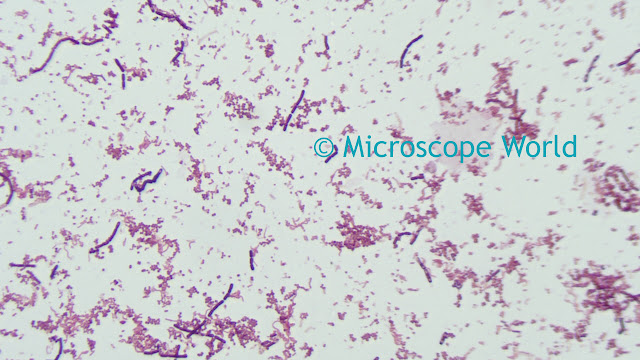
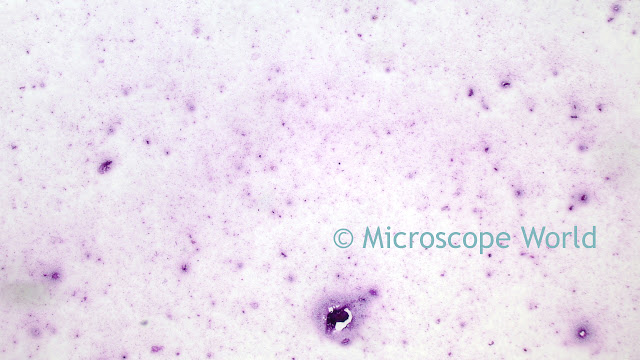
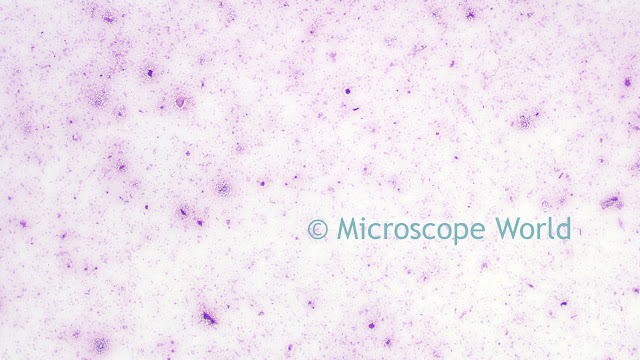
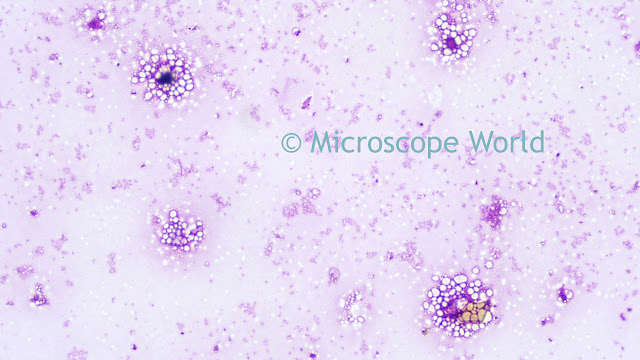
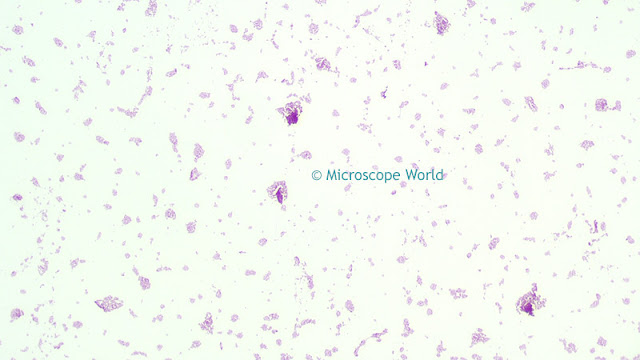
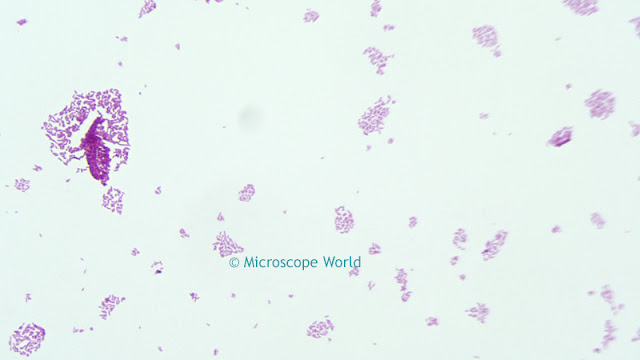
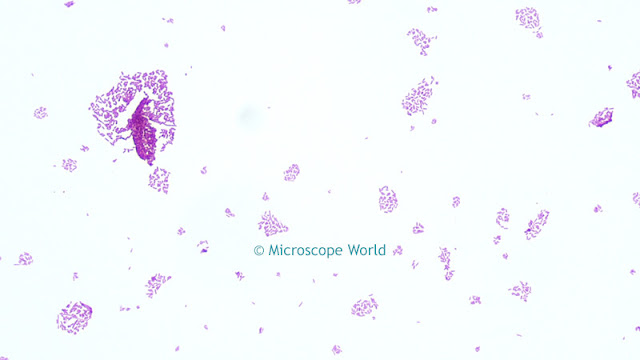
Microscope World recently took a Gram stain prepared slide of three different types of bacteria and captured images using different microscope objective lenses. The microscope used to view the bacteria was the Fein Optic RB30 biological lab microscope.

Fein Optic RB30 laboratory biological trinocular microscope.
Fein Optic RB30 Microscope

Bacteria under a biological microscope at 40x magnification.
Bacteria captured using the Plan Achromat 4x Objective Lens (40x total magnification).

Bacteria under a biological microscope at 100x magnification.
Bacteria captured using the Plan Achromat 10x Objective Lens (100x total magnification).

Bacteria under the biological lab microscope at 400x magnification.
Bacteria captured using the Plan Achromat 40x Objective Lens (400x total magnification).

Bacteria under the microscope with a plan apochromat fluor objective lens.
Bacteria captured using the Plan Semi-Apochromat Fluor 40x Microscope Objective (400x total magnification).

Click on each image above in order to see a larger image. Can you notice a difference in the quality from the Plan Achromat 40x lens and the Plan Semi-Apochromat Fluor 40x lens?

Painkillers under the Microscope

$
0
0
Maurice Mikkers has a passion for both science and photography. A few years ago when he was on strong pain medication, he got the idea to combine his passions and photograph pain killers under the microscope. He began with several over the counter pain medications.

Diclofenac is a nonsteroidal anti-inflammatory drug (NSAID) that is taken to reduce inflammation and as an analgesic reducing pain in certain conditions. It is sold over the counter in most countries for minor aches and pains as well as fever associated with common infections.

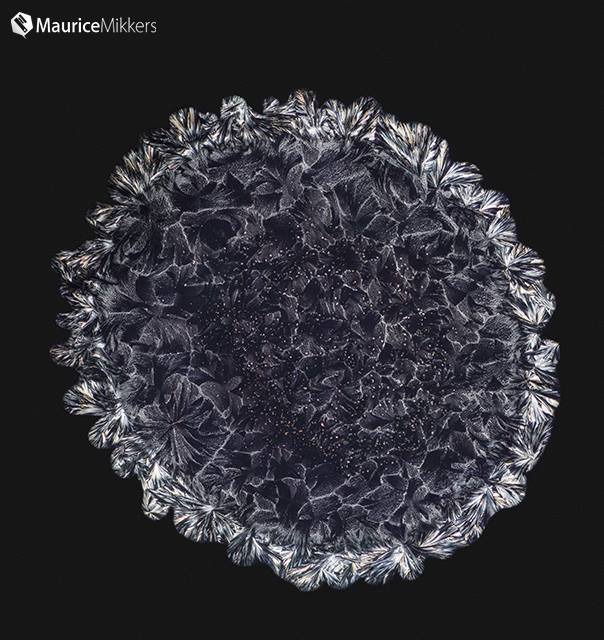
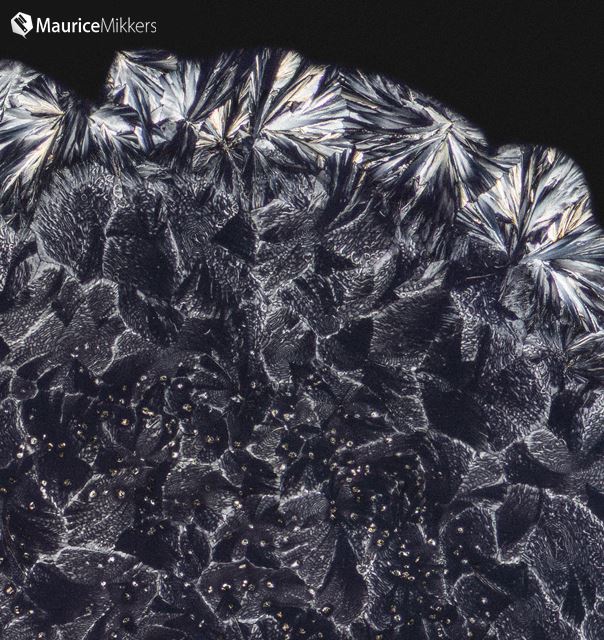
Mikkers photographed the Diclofenac crystals after preparing a slide and waiting 72 hours. He captured the images using a polarizing microscope and a Canon ESO 5D Mark III 22 megapixel camera.

Maurice Mikkers image of Diclofenac under polarizing microscope.
Diclofenac crystals under a polarizing microscope. Photo Courtesy Maurice Mikkers
Polarizing microscope image of Diclofenac
Diclofenac crystals under a polarizing microscope. Photo Courtesy Maurice Mikkers

Acetaminophen is a widely used over the counter pain reliever and fever reducer. Acetaminophen is commonly used for the relief of headaches and other minor aches and pains and is a major ingredient in numerous cold and flu remedies.

Mikkers photographed the Acetaminophen crystals after preparing a slide and waiting three hours. He captured the images using a polarizing microscope and a Canon ESO 5D Mark III 22 megapixel camera.

Maurice Mikkers microscopy image of acetaminophen.
Acetaminophen crystals under a polarizing microscope. Photo Courtesy Maurice Mikkers
Polaring microscope image of Acetaminophen by Maurice Mikkers.
Acetaminophen crystals under a polarizing microscope. Photo Courtesy Maurice Mikkers

Aspirin is used to relieve minor aches and pains, as an anti-inflammatory medication, and to reduce a fever. Aspirin also has an anti-platelet effect by inhibiting the production of thromboxane, which under normal circumstances binds platelet molecules together to create a patch over damaged walls of blood vessels.

Mikkers photographed the Acetaminophen crystals after preparing a slide and waiting one hour. He captured the images using a polarizing microscope and a Canon ESO 5D Mark III 22 megapixel camera. 

Microscopy image of Aspirin under a Polarizing Microscope
Aspirin crystals under a polarizing microscope. Photo Courtesy Maurice Mikkers
Microscopy image of Aspirin under a polarizing microscope. Photo by Maurice Mikkers.
Aspirin crystals under a polarizing microscope. Photo Courtesy Maurice Mikkers
Maurice Mikker's microscope / camera setup.


Thank you to Maurice for sharing his microcopy images with Microscope World. He has captured other images of drugs and medicine under the microscope and you can view these images by Maurice Mikkers here.

Tissue captured with HD Camera under Microscope

$
0
0
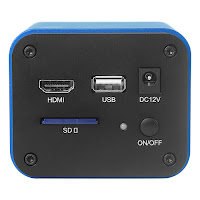
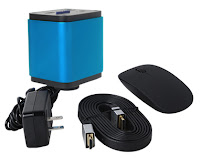
These images of tissue were capturing used the UX-1 Plan Achromat microscope and the HDCAM4 High Definition Microscope Camera. The HD camera is a video camera that allows for capture of images using the SD Card. This camera is a great teaching / training tool, as it provides a high frame rate for live images and the HDMI cable allows direct connection to a monitor. The camera includes a mouse for use when connected directly to a monitor to control on-screen measuring, mirror feature, comparison, zoom, freeze and cross bar.
High Definition microscope video camera with SD Card capture.
Back of HDCAM4 microscope video camera.

High Definition Microscope Video Camera
HDCAM4, power cable, HDMI cable and Mouse.


The images below of tissue were all captured using the HDCAM4 high definition microscope camera. Images were saved to the SD memory card.

Microscopy image of tissue.
Tissue under the UX-1 microscope captured using the HDCAM4 camera.

Microscope image of tissue captured with Richter Optica UX-1 Plan Achromat microscope.
Tissue under the UX-1 microscope captured using the HDCAM4 camera.

Image of tissue captured under a biological microscope.
Tissue under the UX-1 microscope captured using the HDCAM4 camera.

Image of tissue captured under a biological microscope using a HD camera.
Tissue under the UX-1 microscope captured using the HDCAM4 camera.

Whooping Cough under the Microscope

$
0
0
Bordetella Pertussis is a gram-negative, aerobic coccobacillus capsulate of the genus Bordetella, and it is the causative agent of whooping cough. Whooping cough is an infection of the respiratory system characterized by a "whooping" sound when the infected person breathes in. Before a vaccine was available whooping cough killed up to 20,000 people per year in the United States.  But between 1985-1988 fewer than 100 children died from whooping cough.

The images below are of Bordetella Pertussis (whooping cough) and were captured using the RB30 laboratory microscope and the HDCAM4 high definition microscope camera.

Bordetella Pertussis under the microscope at 40x.
Bordetella Pertussis (whooping cough) under the RB30 microscope using 4x Plan Achromat Objective.
Whooping cough bacteria under the microscope.
Bordetella Pertussis (whooping cough) under the RB30 microscope using 10x Plan Achromat Objective.
Whooping cough bacteria seen under the microscope at 400x.
Bordetella Pertussis (whooping cough) under the RB30 microscope using 40x Plan Semi-Apochromat Fluor Objective.
If you have questions about the different microscope objectives available, please contact Microscope World.

Ore Under the Microscope

$
0
0
An ore is a type of rock that contains sufficient minerals with important elements including metals that can be extracted from the rock for money. Examples of ore included quartz, gold, silver, copper, etc.

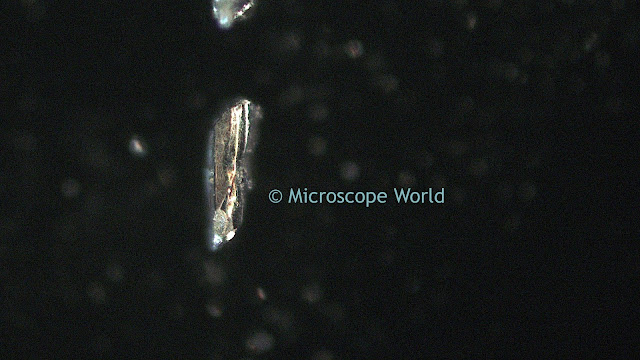
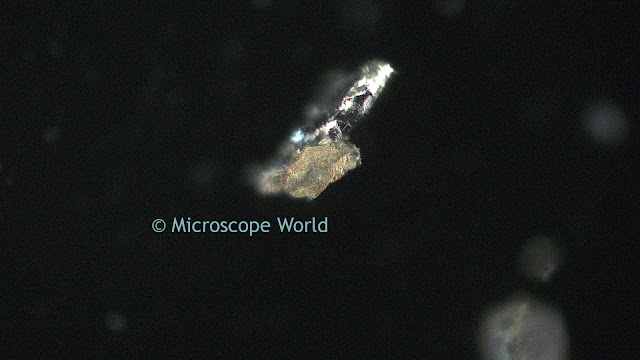
Microscope World recently had a client who wanted to view sand-size particles of ore under the microscope in order to determine the types of ore. The following images were captured using a metallurgical microscope at 200x magnification along with a high definition (HD) microscope camera.

Image of metal ore captured under metallurgical microscope.
Silver and quartz ore under a metallurgical microscope using darkfield microscopy.

Darkfield metallurgical microscope image.
Gold ore under a metallurgical microscope using darkfield microscopy.

Microscopy image of gold at 200x.
Metal ore image under metallurgical microscope using darkfield.

Metallurgical microscopy image of quartz and silver.
Quartz and silver under a metallurgical microscope using darkfield illumination.

Microscopy image of silver at 200x.
Silver under the metallurgical microscope with darkfield.

Microscopy image of gold under the metallurgical microscope.
Gold ore captured at 200x under a metallurgical microscope.

Quartz under the microscope.
Quartz under the metallurgical microscope.

Silver under the microscope.
Metallurgical microscope image using darkfield of silver ore.

Microscopy image of metal.
Metal ore captured under metallurgical microscope.

Metallurgical microscope image of metal at 200x.
Metal ore captured under a metallurgical microscope using darkfield.


Pen under Stereo Microscope

Importance of Color Reproduction in Scientific Images

$
0
0
Human eyes receive light via two photoreceptors: cones and rods. When looking at objects under different lighting conditions, humans tend to see the same objects as having the same color. For example, an apple will appear red whether it is lit by daylight or a candle, and a white sheet of paper will be perceived as being white no matter the light source. This is known as chromatic adaptation or color constancy.


When it comes to viewing microscopic specimens with a monitor or capturing microscopy images with a microscope camera the colors perceived through the eyepieces will differ from those viewed on the screen or captured in the camera. Color reproduction is a key and important part of capturing scientific images. For example, when viewing a histology slide that has been stained with hematoxylin and eosin, if the colors are not represented properly the slide could be diagnosed improperly. Images need to be compared to previous samples and poor color reproduction could lead to problems.

In image processing, chromatic adaptation is referred to as "white balance" or "color balance". Electronic image sensors and processors don't match human cones and rods and therefore color correction is an important component of capturing microscopy images.

Microscope cameras with CCD or CMOS sensors are sensitive to infrared (IR) light, which can have the effect of reducing image contrast. Some cameras incorporate IR filters that can compensate for this sensitivity. Microscope filters are also used to compensate in this area as well.

Color reproduction will vary between microscopes, room set-up, and lighting conditions. In addition, colors vary depending on samples, stains and fluorophores that are used. When possible, always use the same microscope system and ensure it is correctly aligned for Koehler Illumination.

Koehler Illumination is a method that provides optimum contrast resolution by focusing and centering the light path and spreading it evenly over the field of view. This process is used to achieve bright and even illumination across the sample, while ensuring that the illumination source is invisible to the resulting image. This helps create the best possible image quality and Koehler illumination is the method of choice for the majority of modern biological microscopes.

This post is part of a 3-part post that will cover:
Check back next week for the remainder of this 3-part post.

Source: Lumenera White Paper Series

Factors Affecting Color Reproduction in Microscopy Images

$
0
0
There are several factors that affect color reproduction when capturing images under the microscope. It is important to keep color reproduction as consistent as possible in digital microscopy. You can read more about the importance of color reproduction in scientific images here.

Light Source

Colors are often referred to as "warm" or "cool", and this relates to color temperature. Color temperature is measured in Kelvin (K). It is a bit counter-intuitive, but higher temperature colors are called "cool colors" (such as blue or white) and lower temperature colors are known as "warm colors" (reds and yellows).

Microscope light sources vary with color temperature. Daylight is regarded as 5000 K and a halogen lamp has a temperature of around 3200 K. Microscope filters can be used to raise or lower the temperature of the light source. Color temperature isn't everything though, a variety of light sources may have the same color temperature, but have different spectral properties. Also, color temperature isn't a reliable prediction of how specimens will be viewed and processed by the microscope imaging system.


Camera Type

CCD microscopy cameras and CMOS microscopy cameras can be adjusted electronically for white balance. However, the light sensing elements of these sensors are monochromatic and a color image is obtained by detecting the light that passes through red, green and blue (RGB) filters, which cover each individual pixel in the sensor array. Different microscope cameras have different color correction systems. The software alone controls some systems and others require both software and hardware adjustments. Some settings cannot be altered by the user, meaning it is important to select a camera that has good color reproduction and color correction.

Lumenera has designed one software adjustment system for use in their cameras and specific applications called Color Correction Matrices, which uses a color reference matrix to compare each color component of the image.

Improper White Balance

White balance is the process of removing unrealistic color cast in an image. Because light sources vary in color temperature, this will have an effect on the white balance of an image on screen or captured by a camera. The example below shows images before and after white balance has been applied.


A - Microscope slide color chart.
B - Microscope slide color chart after white balance.
C - Feline Adrenal gland stained with hematoxylin and eosin stain.
D - Feline Adrenal gland stained with hematoxylin and eosin stain after white balance.

Images were captured with an Olympus BX51 biological microscope using a halogen lamp with daylight filter and an Infinity 3-3URC microscope camera.

White balance adjustments should be performed anytime the lamp intensity is altered or filters are inserted into the optical path.

Choice of Monitor

Color reproduction will vary between monitors. Monitors must be calibrated when first installed. Calibration should be performed at regular intervals over the lifetime of the display. Additionally, if correct color balance is important for imaging of samples, a medical display monitor is recommended. These specialized monitors offer a more accurate reproduction of color than standard monitors.

This post is the second part of a 3-part post that covers:
Check back next week for the final part of this 3-part post.

Source: Lumenera White Paper Series

How to Optimize Color Performance for USB Cameras

$
0
0
Optimizing color performance for USB microscope cameras is just as important as setting up the microscope properly. This post was created with Lumenera microscope cameras in mind, but applies to many other microscopy cameras as well.

Once the camera, illumination source, and optics have been configured, the application software should be used to display the camera image and manipulate the camera settings. When you first start the camera control software, refer to the live video preview from the camera, and begin by adjusting the settings for Exposure and Gain. It is important to manipulate these two setting first, regardless of how the colors appear in the image on the monitor.

Step 1 - Exposure & Gain Adjustments

It is important for the image to be properly exposed before making adjustments to any other camera properties. Verify that the camera gain is set between a value of 1 and 3 to begin. Next, adjust the exposure to increase or decrease the intensity of the scene. This can be accomplished by moving the exposure slider control, typing a specific exposure value, or enabling the Continuous Auto Exposure control. If the Auto Exposure Control is used, choose an average pixel intensity value in the range of 150 to 200 to begin.

Increasing the camera's exposure time will result in the frame rate performance being reduced. For example, if each frame requires 100ms of exposure, then the camera will only be able to deliver 10 frames per second (fps), and an exposure time of 200ms will result in only 5fps. Therefore it is generally preferable to keep the camera operating at shorter exposure times. If the illumination level cannot be increased, then the camera gain may need to be increased. The gain adjustment is an amplification of the signal from the sensor chip. Too much gain being applied will result in the image developing the appearance of electronic noise in the output.

Step 2 - White Balance

Once the camera settings are providing a live preview image with suitable brightness, the next step is to balance the camera's red, green and blue channel output for the light source. A correct white balance can only be obtained on a camera where the output is below the maximum intensity. For this step, place a white card in front of the lens. If the camera is used on a microscope with transmitted light, use the background light source for the white balance operation, by removing the sample from the field of view. Click on the White Balance function in the application software. The live preview image should now show a grey result. Replacing the sample in the field of view, or removing the white card from in front of the lens should result in the live preview image showing colors that look accurate - however, there may be further fine-tuning required to obtain the best results.

Image before white balance (left) and after white balance (right).

Be aware that many microscope illumination sources will vary in color temperature as the intensity is adjusted. The ratio of red, green and blue wavelengths in the lamp will change as the power level increases or decreases, or if optical filters are added to the light path. A new white balance adjustment may be required each time the lamp intensity is altered. For this reason, it is recommended that the camera's exposure slider be used as the preferred adjustment when the amount of light reaching the camera varies. Also check the monitor settings, as individual display monitors can vary greatly.

Step 3 - Further Adjustments

Color Correction Matrix (CCM)

A camera's response varies with different illumination sources, due to the fact that artificial lighting cannot produce a full spectrum of light. This means that they do not produce an even amount of light across all possible color frequencies. The purpose of a color correction matrix is to allow the camera to reproduce the color of the scene as faithfully as possible by compensating for the missing color frequencies in the light source. Sunlight is the only full spectrum illumination source.

Each camera supports several CCMs, depending on the application software. The basic ones include: incandescent, fluorescent, halogen and daylight. Each CCM is tuned for the spectral response of the light source, to provide the optimal color performance that matches the specific sensor characteristics in each camera model. In certain situations, the illumination used may not be accurately represented by any of the default CCMs, so an option is available to define a custom color correction matrix.

Since the appearance of the camera image is impacted by so many configuration settings (including the monitor), select a CCM that produces the color response that you desire, rather than relying solely on the name of the CCM that matches your lamp type.

Gamma

Setting a suitable gamma correction value is based on the type and quality of the display monitor, in addition to the target scene and illumination. Gamma correction is implemented as a look-up table on-board the Lumenera camera, where the intensity values are altered in real-time, based on the numerical value of this setting. A default value of 1.0 is suitable for most flat-screen monitors. This value can be adjusted based on the monitor performance, until it provides the best color and separation of the range of intensity values.


For example, if insufficient detail is discernible in the darker regions of a scene, this normally means that the gamma value should be increased. This will brighten up these regions and provide images with an improved color performance.

Saturation

This parameter alters the manner in which output colors are presented. Saturation is a characteristic of the observation of color. Saturated colors are called strong and vivid. De-saturated colors are referred to as weak or washed out. By default, the camera does not apply any saturation. Values greater than the default value make the images more saturated in color, i.e. the colors become more vibrant, while values less than the default setting make the images less saturated. Reducing the saturation setting to the minimum value removes all of the color information from the images, thus producing a monochrome result.


For example, increasing saturation will make red areas more red, green areas greener, etc. There is a limit to this, beyond which incorrect hues are introduced. Normally, saturation will only need to be adjusted in the range of +/-30% to achieve optimal response from the camera. Values outside of this range will affect the image dramatically and result in poor color performance.

Contrast, Hue, Brightness

It is recommended that contrast, hue and brightness be left at their default values at all times. Even subtle alterations to the hue will produce an output from the camera with wildly varied colors. If you are having any difficulties in obtaining an accurate color response from your camera, verify that these settings are reset (Contrast = 0, Huge = 0, Brightness = 0).

Demosaicing Method

Most color camera sensors use a monochrome sensor with a color filter mask of red, green or blue over each pixel to capture color information. The typical layout of this arrangement is known as a Bayer filter. The raw images returned from the camera consist only of intensity measurements taken at each pixel. To extract the color information out of the images, a demosaicing algorithm is used to merge the values of neighboring pixels to determine the appropriate missing color values for each pixel location. The number of pixels and the demosaicing method used both determine the accuracy of the color interpretation for each algorithm.

Typically, the camera will use a faster, but lower quality, demosaicing method for the live video preview as the video refresh rate takes precedence over the finest details being resolved. The application software will use the highest quality demosaicing method when capturing an image from the camera.

In most cases, setting the appropriate CCM and demosaicing method along with a proper white/color balance will produce excellent results. There are occasions where it may be necessary to increase the gamma and saturation to improve the color performance of the images and to make the colors more vibrant.

This post is the final part of a 3-part post that also covered:
  • Importance of Color Reproduction in Scientific Images
  • Factors Affecting Color Reproduction

Source: Lumenera White Paper Series

Caffeine under the Microscope

$
0
0
When caffeine enters the brain, it affects nerve centers that are responsible for neurological reward systems. In essence, caffeine makes you feel good and the releasing of dopamine in the prefrontal cortex of your mind reinforces the behavior, consequently making you want to have more caffeine in the future.

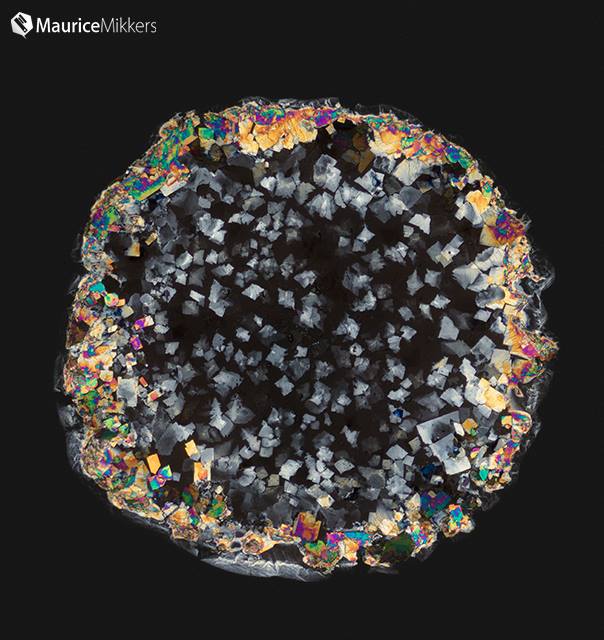
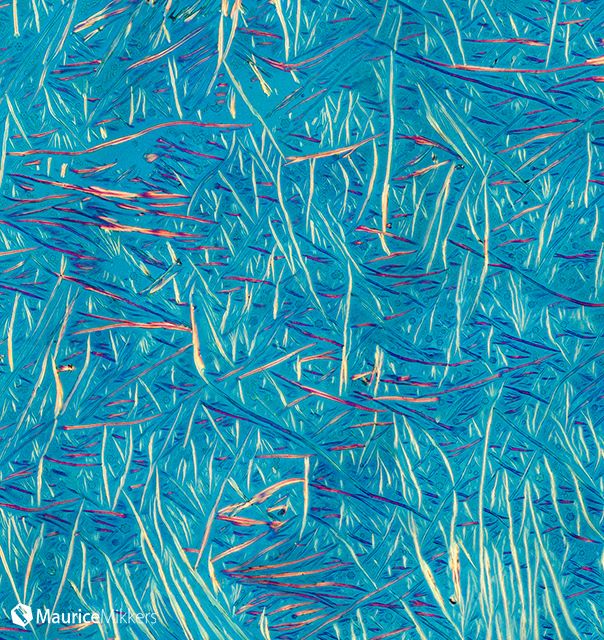
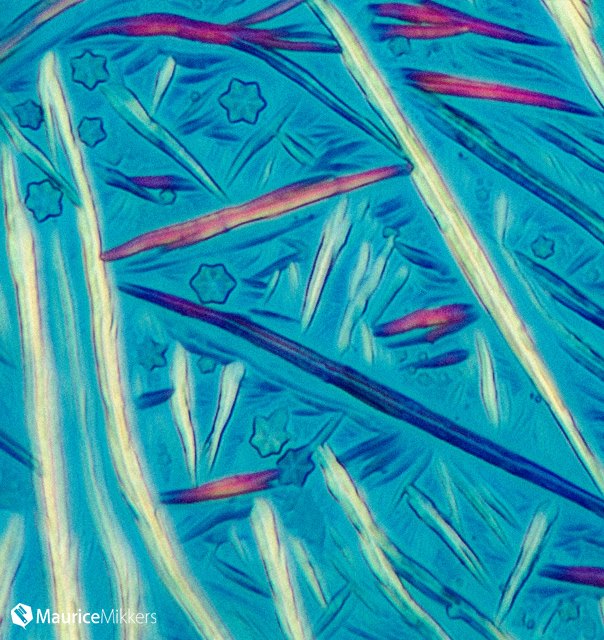
Maurice Mikkers has a passion for both science and photography. A few years ago when he was on strong pain medication, he got the idea to combine his passions and photograph pain killers under the microscope. He then decided to photograph caffeine - the world's most addictive and widely used drug. Caffeine is a widely used natural substance that is also an additive.

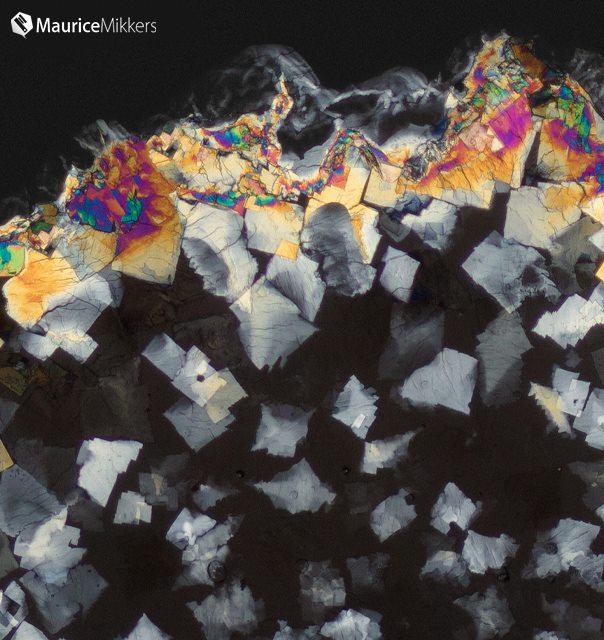
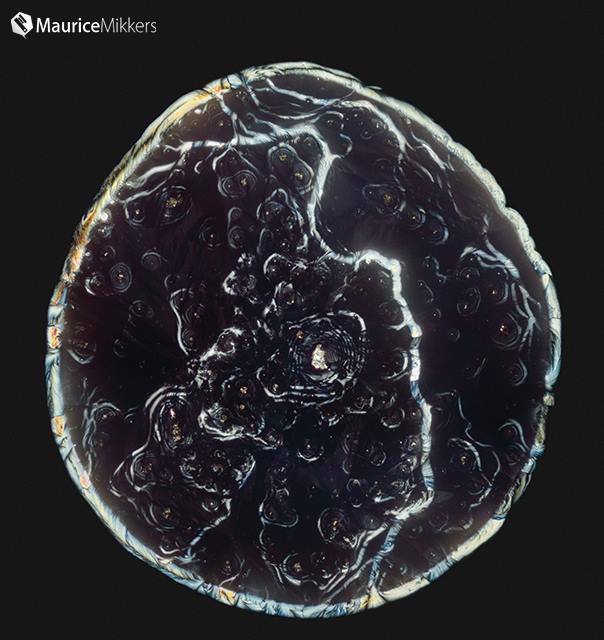
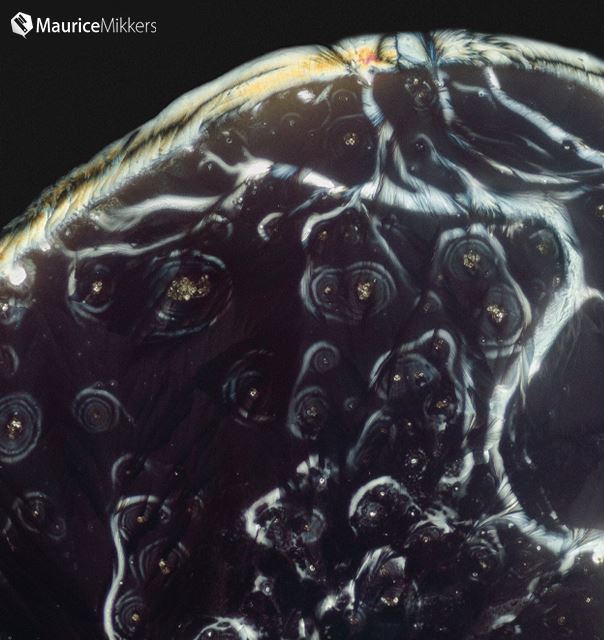
The image below if of the first try of crystallizing 100% caffeine powder. The caffeine powder was added to de-mineralized water and heated in a water bath to 212° F. After this first step, large drops of the sample were placed on a microscope slide, within 45 minutes the drops were fully crystallized and ready for photographing under a polarizing microscope using a Berek compensating filter.

Polarizing microscopy image of caffeine.
Caffeine crystals under a polarizing microscope with Berek filter.
The image shown above is a shot that was captured and made out of 25+ images in a comprehensive grid covering only part of the sample using a Canon ESO 5D Mark III 22 megapixel camera. The images were later stitched together in digital post production.

Polarizing microscopy image of caffeine.
Caffeine crystals under a polarizing microscope with Berek filter.

Thank you to Maurice for sharing his microcopy images with Microscope World. He has captured other images of drugs and medicine under the microscope and you can view more images by Maurice Mikkers here.

Rhodospirillum Rubrum (Bacteria) under Microscope

$
0
0
Rhodospirillum rubrum is a gram-negative, pink colored Proteobacterium. This type of bacteria is known as a facultative anaerobe, which means it can use alcoholic fermentation under low oxygen conditions or use aerobic respiration in aerobic conditions. Under aerobic growth photosynthesis is genetically suppressed and Rhodospirillum rubrum is then colorless. After the exhaustion of oxygen, Rhodospirillum rubrum immediately starts the production of photosynthesis apparatus including membrane proteins, bacteriochlorophylls and carotenoids, i.e. the bacterium becomes photosynthesis active. The repression mechanism for the photosynthesis is actually not well understood. The photosynthesis of Rhodospirillum rubrum differes from that of plants as it does not possess chlorophyll, but instead uses bacteriochlorophylls.

The images below of Rhodospirillum rubrum bacteria were captured using the Fein Optic RB30 biological microscope and the HDCAM4 high definition microscopy camera.

Bacteria captured under the Fein Optic RB30 microscope.
Bacteria under the RB30 microscope using a 4x Plan Achromat objective.

Bacteria captured at 40x under the Fein Optic RB30 biological lab microscope.
Bacteria under the RB30 microscope using a 10x Plan Achromat objective.

Fein Optic RB30 microscopy image of bacteria at 400x.
Bacteria under the RB30 microscope using a 40x Plan Achromat objective.

Bacteria under the microscope at 400x using a plan fluor objective lens.
Bacteria under the RB30 microscope using a 40x Plan Fluor objective.

Plankton (Chaetoceros) under the Microscope

$
0
0
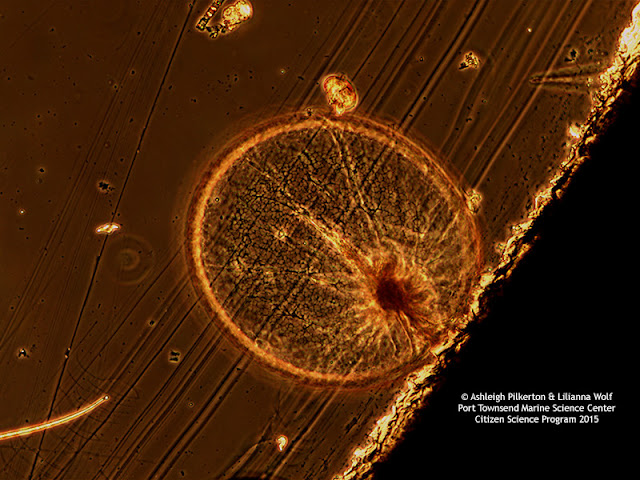
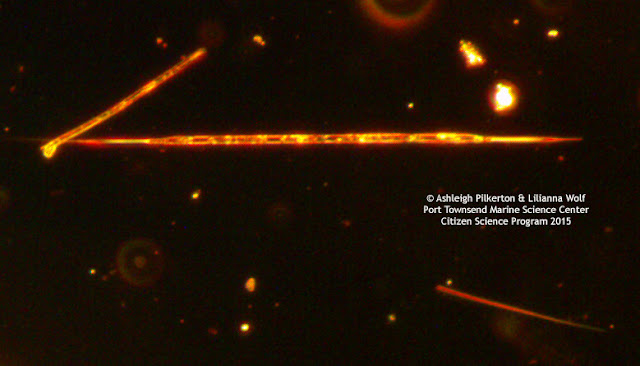
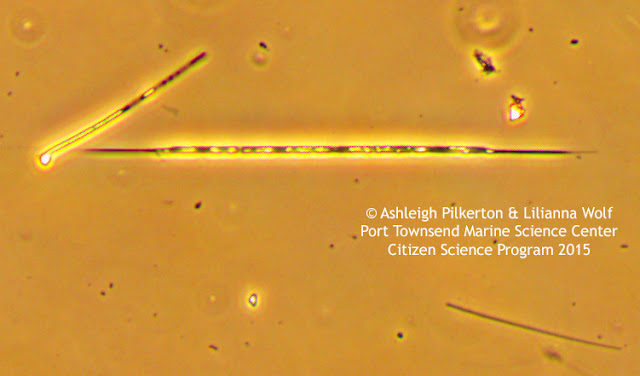
Chaetoceros sp. is one of the largest genus of marine planktonic diatoms with approximately 400 species. Chaetoceros is a centric diatom with very lightly silicified frustules. Each frustule posseses four long, thin spines (setae). Setae link the frustules together to form colonies of several cells.

The images below of Chaetoceros sp. were collected at Fort Worden in Port Townsend, Washington, USA by Asheligh Pilkerton and Lilianna Wolf for the Port Townsend Marine Science Center (2015 Citizen Science Program).

The images below were capturing using the DCM3.1 microscope camera (3.2 megapixels) and a Zeiss Phase Contrast microscope.

Brightfield image Chaetoceros sp. captured under the microscope.

Darkfield image of Chaetoceros sp. captured under the microscope.

A huge thank you to the Port Townsend Marine Science Center Citizen Science Program 2015 for sharing these images with Microscope World.

Noctiluca under the Microscope

$
0
0
Noctiluca is a dinoflagellate commonly known as "sea sparkle" because it exhibits bioluminescence when disturbed. This free-living, non-parasitic species is found in the marine environment. Noctiluca devours food that includes plankton, diatoms, other dinoflagellates, fish eggs and bacteria. This species is commonly found along the coast, in estuaries, and shallow areas that receive plenty of light which promote the growth of phytoplankton, which is a primary diet source for Noctiluca.

Samples were collected at Fort Worden in Port Townsend, Washington, USA by Ashleigh Pilkerton and Lilianna Wolf for the Port Townsend Marine Science Center (2015 Citizen Science Program).

The image and video below were captured using the DCM3.1 microscope camera (3.2 megapixels) and a Zeiss Phase Contrast microscope.

Dinoflagellate under the microscope.
Noctiluca Protoperidinium captured under the microscope.

A huge thank you to the Port Townsend Marine Science Center Citizen Science Program 2015 for sharing these images with Microscope World.

Etaluma Lumascopes

$
0
0
Microscope World is proud to offer the entire line of Etaluma Lumascopes. Etaluma offers three Lumascope inverted compact microscope options. These microscopes are ideal for live cell imaging, checking cell growth and fluorescence protein expression. The microscope systems' unique size allows the Lumascope to be place in an incubator to monitor real-time cell growth while capturing and recording video and time-lapse series.

Lumascope 400

Etaluma Lumascope 400 brightfield inverted compact microscope.
The Lumascope 400 provides brightfield microscopy and has the option to perform phase contrast. This microscope features a color CMOS camera and software and does not require an external power supply other than the USB computer connection.

The images below were captured using the Lumascope 400 with brightfield.

Brightfield image of epidermis under the Etaluma Lumascope 400 microscope.
Epidermis captured with Lumascope 400
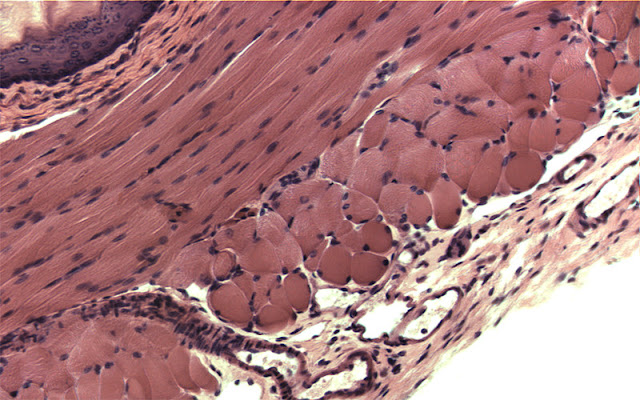
Dog esophagus captured with the Etaluma Lumascope 400 microscope.
Dog esophagus captured with the Lumascope 400

Lumascope 500

Etaluma Lumascope 500 inverted microscope for green fluorescence and phase contrast.
The Lumascope 500 provides brightfield and green fluorescence, as well as optional phase contrast. The inverted microscope is simlar to the Lumascope 400 in that you can capture images and time-lapse video. The compact Lumascope footprint enables working in challenging locations including inside incubators, hoods and biological safety cabinets.

The image below was captured with the Lumascope 500 using green fluorescence.

Lumascope 500 green fluorescence image.
Green fluorescence image using Lumascope 500.

Lumascope 620

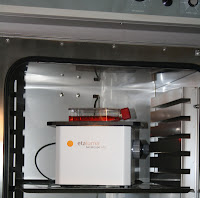
Etaluma Lumascope 620 fluorescence inverted microscope inside an incubator.
The Lumascope 620 shown at left inside an incubator provides brightfield, blue, green and red fluorescence. The Lumascope 620 also has an optional phase contrast component that can be purchased. The Lumascope 620 is compact in size, uses a color CMOS camera and software without need for additional power supply other than the USB computer. This microscope detects blue, green, and red fluorophores, including BFP, DAPI, FITC, Fluo-4, GFP and mCherry.

The images below were captured using the Lumascope 620.


Fluorescence image captured under Etaluma Lumascope 620 inverted microscope.
Red, Green, Blue Fluorescence using Lumascope 620.
Red fluorescence captured under the Etaluma Lumascope 620 microscope.
Red Fluorescence using Lumascope 620
For more information about Etaluma Lumascopes and Lumascope Accessories including objective lenses and stage accessories, you can contact Microscope World.

Air Pollution Science Project

$
0
0
For this student science project examining air contaminants you will need the following items:
Take a minimum of five microscope slides and spread a thin layer of Vaseline on one side of each slide. There is no limit to the number of slides you prepare. Once each slide is prepared, place each one in a different location for a minimum of a week. Here are some ideas of places you might want to leave your microscope slide:
  • Outside in the back yard
  • Near a construction site
  • On a window ledge
  • Inside a classroom
  • Near a grassy field or a farm
  • In a hair salon (ask the owner)
  • In a bakery (ask the owner) 
  • Near the beach
Prepare two control slides that you will keep inside a closed shoe box over the same time period. Make sure that your outdoor slides will not be disturbed over the time you leave them in their location. After you have left the slides for the specified time period, when you retrieve them make sure you label each one with its location. You may want to collect the slides inside a shoe box to ensure they don't touch each other.

Place each slide under the microscope, starting at the lowest magnification. Once the microscope is in focus, increase the magnification and move each slide around a bit under the microscope. What kinds of particles have collected on each of the slides? Did some locations collect more debris on the slide than others? How do the slides compare with your control group slides that lived inside the shoe box all week? Which slide has the most particles? What do you think the source of the pollution is on each slide? Would there be a way to reduce this type of pollution? Do you know of any laws that are in effect to help reduce pollution?

Salmonella under the Microscope

$
0
0
Salmonella is a genus of rod-shaped bacteria found worldwide in both cold-blooded and warm-blooded animals as well as in the environment. Strains of Salmonella cause illness such as typhoid fever, paratyphoid fever and food poisoning.

The images shown below are of Salmonella Typhosa (the strain that casuses typhoid fever). These images were captured using the Fein Optic RB30 biological microscope and the HDCAM4 high definition microscope camera.

Microscopy image of Salmonella at 40x.
Salmonella Typhosa under the microscope at 40x.
Microscopy image of Salmonella at 100x magnification.
Salmonella Typhosa under the microscope at 100x.
Microscopy image of Salmonella at 400x under a biological microscope.
Salmonella Typhosa under the microscope at 400x.
Microscopy image of Salmonella at 400x using a plan semi apochromat fluor objective lens.
Salmonella Typhosa under the microscope at 400x using a Plan Semi-Apochromat Fluor objective lens.

Pseudo-nitzschia (Algae) under the Microscope

$
0
0
The genus Pseudo-nitzschia includes several species of diatoms known to produce the neurotoxin known as domoic acid, a toxin that is responsible for the human illness called amnesic shellfish poisoning (ASP). This genus of phytoplankton is known to form harmful algal blooms in coastal waters of Canada, California, Oregon, Washington, Europe, Asia, New Zealand, Central and South America.

These samples of Pseudo-nitzschia were collected at Fort Worden in Port Townsend, Washington, USA by Ashleigh Pilkerton and Lilianna Wolf for the Port Townsend Marine Science Center (2015 Citizen Science Program).
The images below were captured using the DCM3.1 microscope camera (3.2 megapixels) and a Zeiss Phase Contrast microscope.
Microscopy image of algae Pseudo-nitzschia.
Pseudo-nitzschia under the microscope.

Pseudo-nitzschia image under the microscope.
Pseudo-nitzschia under the microscope.

Microscopy algae image.
Pseudo-nitzschia under the microscope.

A huge thank you to the Port Townsend Marine Science Center Citizen Science Program 2015 for sharing these images with Microscope World.

You can learn more about Pseudo-nitzschia here.
Viewing all 422 articles
Browse latest View live