Quantcast
Channel: Microscope World Blog
Viewing all 422 articles
Browse latest View live

48 New Land Snail Species Discovered

$
0
0
Researchers recently added to their knowledge of land snails of Sabah (Malaysia, Borneo) including the discovery of 48 new species of land snails. Jaap J. Vermeulen, Thor-Seng Liew and Menno Schilthuizen reported on their findings in a full abstract here. Land snails were collected in large quantities from a variety of areas including quarries, river beds and on the side of the road. The land snails were then examined and viewed under a stereo microscope.


The drawings of the land snails below were created using a stereo microscope along with a camera lucida device to aid in drawing. When naming the new snails, in the enumerations of localities, words were used from the Malay language: batu (= rock), bukit (= hill), gua (= cave), gunung (= mountain), pulau (= island), and sungai(= river).

Stereo microscope image sketch of land snails found in Malaysia
Sketch courtesy: Additions to Knowledge of Land Snails Research Article

The land snails labeled 1 are Acmellacyrtoglyphesp. 1A & 1B were found in the Sepulut Valley in the Interior Province of Sabah, Malaysia. 1C was found in Kinabatangan Valley in the Sandakan Provice.
The land snails labeled 2 are Acmellaumbilicatasp. and were found in the Pinangah Valley in the Interior Provice of Sabah, Malaysia.
  • Land snail 1A is 1.4mm high and when viewing this land snail with a stereo microscope at 50x magnification, the land snail would fill about 30% of the field of view
  • Land snail 2A is 1.3mm high and when viewing this land snail with a stereo microscope at 50x magnification, the land snail would fill about 28% of the field of view.
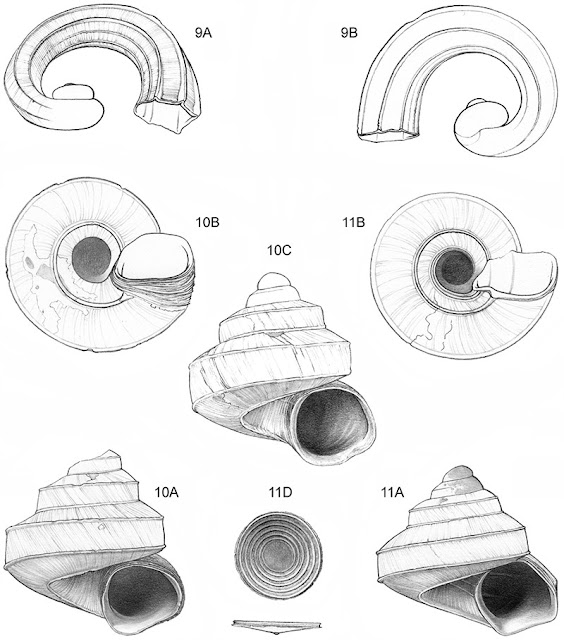
 
Land snails from Malaysia under a stereo microscope.
Sketch courtesy: Additions to Knowledge of Land Snails Research Article
The land snails labeled 9 are Ditropopsisdavisonisp. and were found in the Matang River South of Long Pasia in the Upper Padas in Sabah, Malaysia.
The land snails labeled 10 are Ditropopsistrachychilussp. and were found on Kota Kinabalu-Tambunan road in Crocker Range N.P. in Sabah, Malaysia.
The land snails labeled 11 are Ditropopsiskoperbergi and were found in the Danum Valley Conservation Area, Sabah, Malaysia.
  • Land snail 10A is 2.3mm high and when viewing this land snail with a stereo microscope at 50x magnification, the land snail would fill about 50% of the field of view

Small land snail under the microscope!
Sketch courtesy: Additions to Knowledge of Land Snails Research Article


The land snails labeled 3 are Acmellapolita and were found in the north end of the limestone ridge on the East bank of the Tabin River in the Segama Valley, Sandakan Province, Sabah, Malaysia.
The land snails labeled 4 are Acmellaovoideasp. and were found in the Pinangah Valley in the Interior Province of Sabah, Malaysia.
The land snails labeled 5 are some of the smallest land snails discovered: Acmellananasp. and were found in the Niah Caves on the west side of the quarry in Sarawak, Malaysia.
  • Land snail 5A is 0.7mm high and when viewing this land snail with a stereo microscope at 50x magnification, the land snail would only fill about 15% of the field of view

Kids Science Project: Fungus Growth

$
0
0
Bacteria, fungi and other microscopic organisms that live in soil, air and water are responsible for turning once-living plants and animals into nutrients that can be used again. Decomposition may seem gross when you find bread molding in the fridge, but it is actually a fundamental process on which all life depends! Fungi are able to produce special enzymes that allow them to break down dead plants and animals and use them as food.

Growth of bacteria and fungi can occur at an amazingly fast rate. In four hours one bacterium can grow to a colony of over 5,000. In just one teaspoon of soil there are more bacteria and fungi than the number of people on earth!

This kids science project involves growing fungus on bread, observing it as it grows, and then viewing the bacteria under a dissecting microscope (low magnification microscope).

Items required:
  • 3 Petri Dishes
  • 3 Ziplock bags
  • 3 Slices of bread 
  • Two different types of soil (from different areas or gardens)
  • Stereo Microscope
Place a slice of bread on a flat surface and press the petri dish into the bread, removing the excess. Do this for each petri dish. Mix two bowls of soil with water. Place about ten drops of soil water on two of the bread samples (the third sample does not get any soil - it is your control group). Place each petri dish inside a ziplock bag and seal the bag. Make sure you label them! Place the sealed bag petri dishes into brown paper bags and put them in a warm, dark environment to promote bacteria and fungi growth.

Each day remove the petri dish from the bag and observe any mold growth under the microscope. Write down your findings and draw or capture images. Are the colonies of bacteria or fungi different sizes and colors? Is one bread petri dish growing faster than another?

Microsocpy image of Funghi spores.
Funghi spores under the microscope.

Definitions for students writing science reports on this experiment:

Bacteria - a widely distributed group of typically one-celled microorganisms, some of which produce disease. Many are active in processes of fermentation, which is the conversion of dead organic matter into soluble food for plants.

Decomposition - organic decay.

Decomposers - organisms which break materials down into parts and cause them to rot.

Enzymes - any of a number of proteins or conjugated proteins produced by living organisms and functioning as biochemical catalysts.

Fungus - any of a number of plants lacking in chlorophyll, including yeasts, molds and mushrooms.

Top 10 Gift Ideas for Science Enthusiasts

$
0
0
Whether you are shopping for a graduation gift, birthday, or a holiday, science enthusiasts can be tricky to shop for. The list below includes some ideas for both younger and grown-up scientists. Shopping for science geeks just got a bit easier!
Freudian Slippers

Insects Under the Microscope

$
0
0
Microscope World recently wanted to compare two different microscopy cameras for quality and differences in color. The two microscope cameras included the DCM5 documentation camera (5 megapixels) and the HDCAM4 high definition camera (2 megapixels). The onscreen resolution and image quality from the HD camera is amazing, so there was a question as to how the captured image would match up to the onscreen quality.

 To give you an idea of size, this is the insect that was placed under the microscope.

Insect used under the microscope.

The images below were captured using the S6.7 Trinocular Stereo Zoom Microscope.

Insect captured with S6T-LED stereo microscope and DCM5 Microscope Camera at 6.7x.

Insect captured with S6T-LED stereo microscope and HDCAM4 Microscope Camera at 6.7x.

Insect captured with S6T-LED stereo microscope and DCM5 Microscope Camera at 20x.

Insect captured with S6T-LED stereo microscope and HDCAM4 Microscope Camera at 20x.

The color in the DCM5 microscope camera are a bit brighter than those in the HD microscope camera, but overall the image quality was similar. If you have questions regarding microscope cameras please contact Microscope World.

Dissecting Microscopes

$
0
0
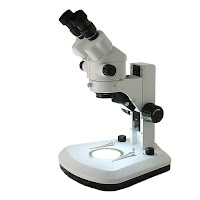
What exactly is a dissecting microscope? There are several different types of dissecting microscopes and we will cover each of them below. A dissection microscope is also referred to as a stereo microscope or a low power microscope.

A few features common among all dissecting microscopes:
  • Dissecting microscopes have working room on the stage. There is room to place larger objects such as rocks or nuts and bolts. In order words, the microscopy sample does not need to be on a microscope slide.
  • Dissecting microscopes use light from above the stage, making it possible to view opaque objects. Some dissecting microscopes also have light beneath the stage, but not always.
  • Dissecting microscopes provide low magnification (usually 10x - 40x is a common range) and they are used to view detail in objects you can already see with the naked eye. Blood cells are not viewed with a dissecting microscope, but rather with a compound microscope.

Single Power Dissecting Microscopes

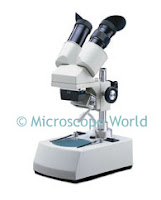
Single magnification stereo microscope MW1-L2.
Single Magnification Microscope

Single power dissecting microscopes offer one single magnification. For example, the microscope might provide 20x magnification. These single power instruments are common in museums or schools where only one magnification is required to view samples. With a single power magnification dissection microscope it is possible to have two magnifications when using a different pair of eyepieces. For example, with a 10x and 15x pair of eyepieces (when the built-in objective is 2x) total magnification would be 20x and 30x. This is an inexpensive way to achieve multiple magnifications from a lower cost microscope.

Dual Power Dissecting Microscopes

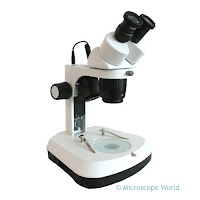
Stereo microscope with dual magnification.
S2 Dual Magnification Microscope
Dual power dissecting microscopes provide two set magnifications. By turning a turret on the bottom of the body of the microscope (the black portion on the image at right), it is possible to flip back and forth between the two magnifications. The objective lenses are built into the microscope (for example, 1x and 3x) and the eyepieces can be changed. On a microscope that includes 10x eyepieces with a built-in 1x and 3x objective, the total magnification is 10x and 30x. Magnification could be increased by purchasing a pair of 15x eyepieces, which would provide 15x and 45x magnification. These microscopes are sometimes used by coin collectors, in schools, and in industrial quality control settings where an inexpensive microscope is required.

Zoom Dissecting Microscopes 

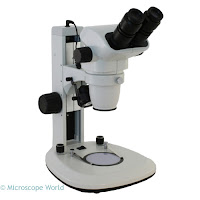
Stereo zoom dissecting microscope.
Stereo Zoom Microscope
Stereo zoom microscopes provide a magnification range and all magnifications within this range can be viewed. The S6 stereo microscope shown at left provides magnification of 6.7x - 45x, which means you can see 10x, 15x, 18x, etc. all the way up to 45x. These are the most commonly used dissecting microscopes, since they provide more options for viewing the exact part of the sample at the desired magnification. Typically when increasing magnification on a stereo zoom dissection microscope, rather than changing eyepieces, an auxiliary lens is added to the bottom of the stereo microscope body. If you were using the microscope shown at left and wanted a bit more magnification, you might add the 1.5x auxiliary lens, which would change the magnification range to 10x - 67.5x. Stereo zoom microscopes are typically used in universities, in industrial settings for quality control and to view small parts, and in manufacturing.

Understanding Microscope Resolution

$
0
0
A common misconception among first-time microscope purchasers is that more magnification is always better. Unfortunately, any microscope that advertises magnification above 1000x is offering empty magnification. You can learn more about empty magnification here. The limiting factor in a microscope is not its magnification, but rather its resolution. Resolution refers to the shortest distance between two separate points in a microscope's field of view that can still be distinguished as distinct entities.

Imagine a drawing that was made with large children's crayons, versus a drawing made with a sharp pencil. Microscopes with poor resolution will provide images that are similar to the crayon drawing, as the images will not be crisp and clear.

Numerical aperture determines the resolving power of a microscope objective lens, but the total resolution of the entire microscope is also dependent on the numerical aperture of the condenser (located beneath the stage on a compound biological microscope). The higher the numerical aperture of the complete microscope system, the better the resolution will be.

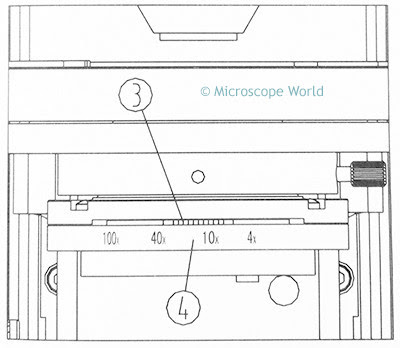
Aligning the microscope optical system is also important to ensure maximum microscopy resolution. The condenser must match the objective with respect to numerical aperture and adjustment of the aperture iris diaphragm. There is a great article here that discusses how to properly align the condenser as well as set the field iris diaphragm. The sketch below shows alignment of the iris diaphragm on the condenser (3) to match the objective value (4) of the current objective being used.

Lining up the iris diaphragm on the microscope condenser.
Iris Diaphragm on Microscope Condenser
Wavelength of light is an important factor in the resolution of a microscope. Shorter wavelengths will yield higher resolution. Therefore, the greatest resolving power in optical microscopy is realized with near-ultraviolet light which has the shortest effective imaging wavelength. When using near-ultraviolet light special Near-Ultraviolet microscope objectives are used.

The resolution of a microscope provides the ability to view samples and specimens clearly. The main factor in determining resolution is the objective numerical aperture, but resolution is also dependent upon the type of specimen, coherence of illumination, degree of aberration correction and other factors such as contrast enhancing methodology in either the microscope's optical system or the sample itself.

Contributing Source: MicroscopyU

Wright's Stain for Microscopy

$
0
0
Wright's stain is a histologic stain that facilitates the differentiation of blood cell types. It is classically a mixture of eosin (red) and methylene blue dyes. It is used primarily to stain peripheral blood smears and bone marrow aspirates which are examined under a light microscope. In cytogenetics, it is used to stain chromosomes to facilitate diagnosis of syndromes and diseases.

Wright's stain is named for James Homer Wright, who devised the stain in 1902. The stain is actually a modification of the Romanowsky stain. Because Wright's stain distinguishes easily between blood cells, it became widely used for performing differential white blood cell counts, which are routinely ordered when infections are suspected.

The blood smear images below have Wright's stain applied to them and were captured with a laboratory microscope.

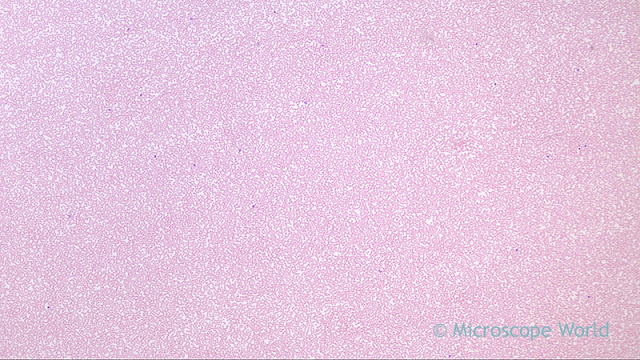
Blood smear with wright's stain under the microscope at 40x magnification.
Blood smear with Wright's Stain captured at 40x under a clinical lab microscope.

Blood smear with wright's stain under the microscope at 100x.
Blood smear with Wright's Stain captured at 100x under a clinical lab microscope.

Microscopy image of blood cells at 400x magnification.
Blood smear with Wright's Stain captured at 400x under a clinical lab microscope.

Blood smear with Wright's Stain captured at 400x under a clinical lab microscope using a Plan Fluor objective.

Beer Brewing & Wine Making Microscopes

$
0
0
Whether you are an expert home brewer, own a company brewing beer, or own a vineyard, a quality beer brewing or wine making microscope can make your job much easier. Here are a few things to look for when selecting a microscope.

Beer Brewing Microscope Tips:

  • You will need magnification in the 400x to 1000x range in order to view cells, bacteria and yeast. If you simply want to count cells, a basic binocular compound microscope such as the basic beer and wine microscope with 400x magnification can do the trick.
  • Make sure you have coarse and fine focusing! The fine focus adjustment is important, especially when using the microscope at the higher magnifications.
  • Get a microscope with a mechanical stage. The mechanical stage will allow you to maneuver your slide in small increments and without frustration.
  • A monocular (single eyepiece) microscope will suffice, although if you spend much time looking through the microscope binocular (two eyepieces) will be much more comfortable.
  • Don't use a microscope with a disc diaphragm - an iris diaphragm on the condenser will allow you to enhance the contrast in your image when you close down the diaphragm.
  • Phase contrast is the best technique for looking at both yeast and bacteria. Phase contrast microscopes vary from simple phase contrast (usually only 40x phase objective) to full phase contrast which provides phase contrast 4x, 10x, 40x, 100x objectives. Phase contrast will allow you to view enhanced images of both yeast and bacteria.
  • Cell counting can be performed with a grid eyepiece reticle or with measurement software included with the microscope digital camera. A hemocytometer is used for counting.
  • The Brewing Science Institute has some great educational info here.
When viewing yeast through the microscope you will use the 40x lens (400x total magnification). Notice whether the cells are bacilli (rod shaped) or cocci (round shaped). Phase contrast will allow you to view yeast or bacteria that is often the same color as the background it is against.

Beer and wine microscopes vary from basic phase contrast and digital basic phase contrast to more advanced full phase contrast microscopes or even an advanced fluorescence beer/wine microscope in order to perform live-dead tests.

Winery and beer brewery microscopes for identifying bacteria, yeast, and mold.
Beer Brewing / Wine Making Microscope

Wine Microscope Tips:

Here are a few tasks every vintner should be able to perform with a microscope.
  • Distinguish between bacteria, yeast and fungi under the microscope. 
  • Identify and differentiate living organisms from plant debris, filter agents or crystals.
  • Identify the most common organisms by sight in order to take action quickly if needed - including wine yeast, mold and bacteria. Phase contrast microscopes are helpful when viewing bacteria and yeast.
  • Count yeast cells and distinguish between living and dead cells.
The easiest way to differentiate bacteria, yeast and mold is by size. Molds are easy to view at 100x magnification, yeast at 400x, and bacteria at 400x or 1000x. Determining if cells are living or dead is best performed by looking at symmetry. Debris tends to be asymmetric, while living organisms are symmetric. View more wine making microscope tips here.

Happy Holidays!

Villous Adenoma under the Microscope

$
0
0
Villous adenoma is a type of polyp that grows in the colon, anywhere else in the gastrointestinal tract, or occasionally other parts of the body. These polyps start out benign, but can become malignant. Villous adenoma has been demonstrated to contain malignant parts in up to one third of affected persons and invasive malignancy in another one third of removed samples. If the affected polyp is large it may be necessary to remove part of the colon.

Villous adenomas can cause severe diarrhea. Since Villous adenoma often create mucus, it can cause the infected perfson to get hypokalemia, which means they have a low level of potassium in the blood.

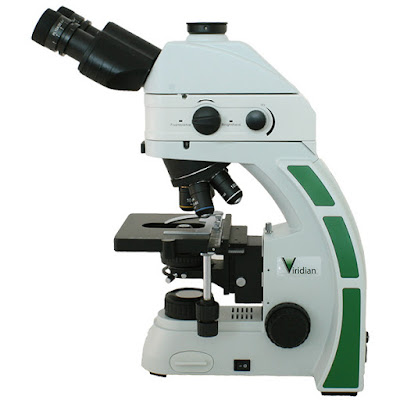
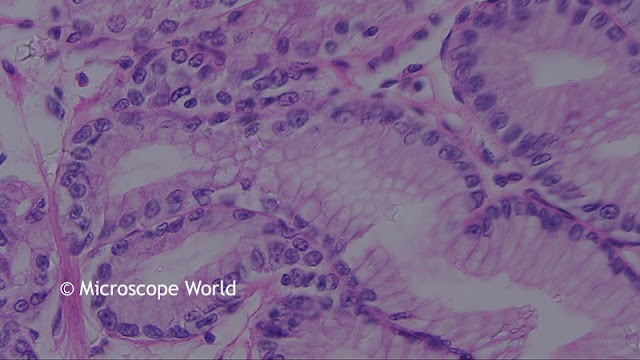
The images below of Villous adenoma were captured using the RB30 biological microscope and the high definition HDCAM4 microscopy camera.

Colon polyp image under the microscope at 40x.
Villous Adenoma under a biological lab microscope at 40x.

Villous Adenoma under the microscope at 100x.
Villous Adenoma under a biological lab microscope at 100x.

Colon polyp under the microscope at 400x.
Villous Adenoma under a biological lab microscope at 400x.

Villous Adenoma under a biological lab microscope using a Plan Fluor Apochromat 40x objective.

Viewing Bacteria with a Microscope

$
0
0
Bacteria can be hard to identify on an unstained microscope slide. Bacteria are difficult to identify under a brightfield microscope because they lack color, are small and also transparent. In other words, bacteria often look similar to the background they are floating around in. Amateur microscopists may also have trouble distinguishing between bacteria and dust or debris in the sample.

Phase contrast microscope image of bacteria.
Bacteria captured under a phase contrast microscope.

The two solutions for the tricky problem of viewing bacteria involve one of the following:

  1. Staining the microscope slide.
  2. Using a phase contrast microscope.

Microscope cell staining is a technique used to enable better visualization of cells and cell parts under the microscope. By using different stains, bacteria or a cell wall are easier to identify. Most stains can be used on non-living (fixed) cells, while only some types of stain can be used on living cells. There is an extensive list of the types of stains and those that can be used on living cells here.

Phase Contrast Microscope from Microscope World
Phase Contrast Microscope

Phase contrast microscopes allow researchers to observe differences between structures that have a similar level of transparency. By eliminating the need for time-consuming staining, phase microscopes allow research to be conducted more quickly and efficiently. A phase contrast microscope is different from a brightfield microscope in three ways. The phase contrast microscope utilizes a phase contrast condenser, phase contrast objective lenses and a phase centering telescope to center the condenser. You can learn more about phase contrast and centering the phase contrast condenser here.

Student Project: Soil Under the Microscope

$
0
0
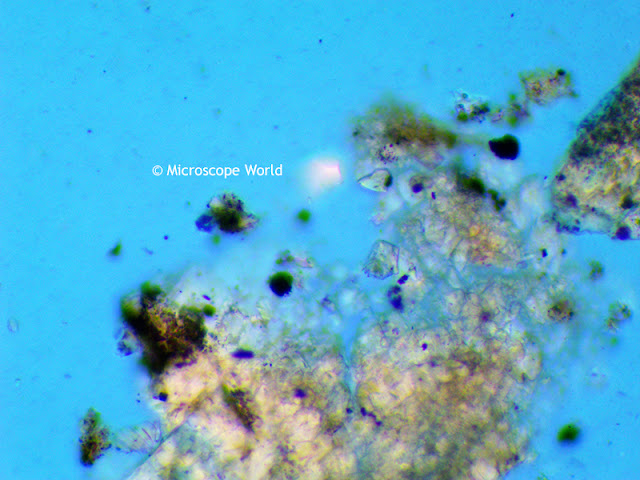
Soil contains a variety of particles, bacteria or even living creatures and can be viewed with a compound biological microscope or with a stereo dissecting microscope.  When using a compound biological microscope to view soil you will want to place only a few particles of soil onto a microscope slide and put a cover slip on top to flatten out the sample. Start at the lowest magnification and work your way up from 40x, to 100x and then finally 400x. Can you identify any living organisms? If you have a camera, capture the image and note the differences between the lowest and highest magnification. If you don't have a camera just sketch what you see under the microscope. Were you able to find any living organisms or maybe a small worm?

If you are using a stereo dissecting microscope, placing a bit more soil on the glass stage plate won't be a problem, and you do not need to cover it with anything since the stereo microscope has a greater working distance.

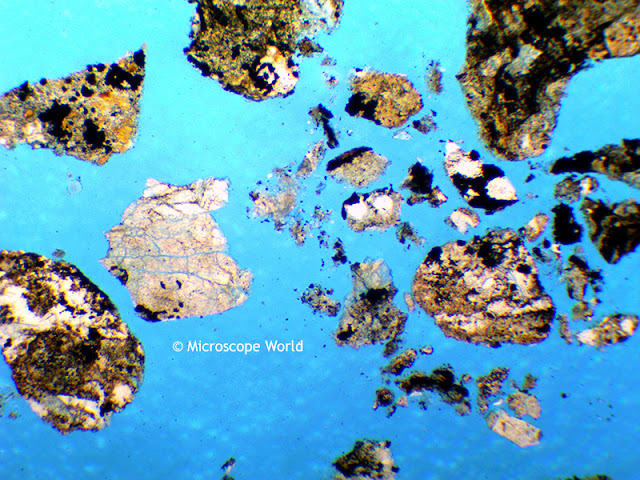
The images of soil shown below were captured with the UX1 High School Compound Microscope using the DCM5 microscope camera with 5 megapixels. Notice some of the cracks in the dry dirt in the first image. And in the final image captured at 400x can you see some of the green moss?

Soil under the microscope at 40x.
Soil captured under the UX1 High School Microscope with the DCM5 camera at 40x.

Dirt captured under the microscope at 100x magnification.
Soil captured under the UX1 High School Microscope with the DCM5 camera at 100x.

Soil under the microscope at 400x magnification.
Soil captured under the UX1 High School Microscope with the DCM5 camera at 400x.

Prostate Cancer under the Microscope

$
0
0
Carcinoma of the Prostate, also known as Prostate Cancer, is the development of cancer in the prostsate. The prostate is a walnut sized gland in the male reproductive system. Most prostate cancers grow slowly, but the cancer cells may spread to other parts of the body, in particular the bones and lymph nodes.

Late stages of prostate cancer can cause symptoms such as difficulty urinating, blood in the urine, or pelvis or back pain while urinating. Feeling tired is another common symptom as the cancer causes low levels of red blood cells.

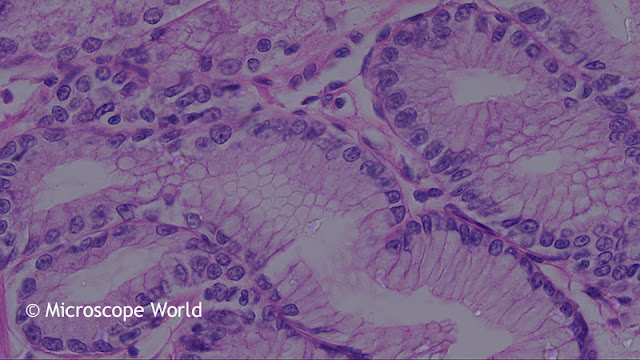
Prostate cancer is diagnosed by a biopsy. The images below of prostate cancer were captured using the RB30 biological lab microscope and the DCM3 microscope camera (3 megapixels).

Microscopy image of prostate cancer at 40x.
Prostate cancer under the microscope at 40x magnification.

About ninety-nine percent of prostate cancer cases occur in men over the age of fifty. Diets high in processed meat, red meat or milk products and low in vegetables can increase prostate cancer risk. 

Lab microscope image of prostate cancer at 40x from MicroscopeWorld.com.
Prostate cancer under the microscope at 100x magnification.

Prostate cancer screening is controversial because prostate-specific antigen (PSA) testing increases cancer detection but does not decrease mortality. PSA testing sometimes results in over-diagnosis and over-treatment as most cancers diagnosed would remain asymptomatic.

Prostate cancer image from MicroscopeWorld.com captured at 400x.
Prostate cancer under the microscope at 400x magnification.

The five-year survival rate for prostate cancer in the United States is ninety-nine percent.

Microscope World image of prostate cancer at 400x.
Prostate cancer under the microscope at 400x magnification using Plan Fluor objective lens.

You can learn more about prostate cancer here.

Quality Control Microscopes

$
0
0
There are a variety of quality control microscope options and depending on your specific needs, this post should help sort out the options.

Basic Inspection of Small Parts

Quality control microscopes with zoom magnification.
S6-ILST Zoom Microscope
For basic inspection of small parts a sturdy quality control stereo microscope will meet all needs. Depending on your budget, there are two options:
  1. A dual power stereo quality control microscope.
  2. A stereo zoom quality control microscope.
With a dual power stereo microscope you will view two set magnifications only. These microscopes are less expensive and the most commonly purchased microscope have 10x / 30x magnification. At 30x your field of view is about 15mm and you would be able to identify flaws that are 1-2mm in size. If you are looking at smaller samples or defects a 15x / 45x microscope is a good alternative.

A stereo zoom quality control microscope is going to provide a lot more control over the magnification. A good magnification range is 7x-45x. This range can be increased even further with higher magnification eyepieces or an auxiliary lens. This magnification chart shows some of the magnification range options of a stereo zoom microscope when different eyepieces or auxiliary lenses are used.

Larger Sample Inspection

Microscope World Articulated Arm Stereo Zoom Microscope System
Articulated Arm Stereo Microscope
When viewing larger samples a stereo boom microscope will provide extra working space beneath the microscope. These microscopes typically use either a dual pipe light or an LED ring light to flood the working area with light. Again, the magnification range of 7x-45x is typically plenty for quality control inspection.

There are several types of boom stands used in industrial settings. The articulated arm microscope (shown at left) provides a lot of options for exact positioning of the microscope body above the sample. Another type of inspection microscope for large parts is a standard boom stand microscope, or a ball bearing boom stand microscope. The ball bearing boom stand microscope is used when the head of the microscope needs to be slid out of the way frequently.

Handheld Inspection Microscopes

Microscope World Handheld Inspection Microscope
There are several options for handheld inspection microscopes. The most common handheld inspection microscope is also known as a shop microscope (shown at left). This microscope has a single magnification and a built-in eyepiece reticle for making measurements. The handheld inspection microscope is placed directly on top of the object that needs to be viewed and when looking through the eyepiece the ruler is imposed directly on the sample, making it easy to quickly make measurements.
Microscope World digital handheld inspection microscope.
The other type of handheld inspection microscope is a digital inspection microscope. This microscope does not have any eyepieces to look through, instead all images are displayed directly on a computer or laptop. The included software allows image capture, making measurements and adding annotations to images. The digital handheld inspection microscope is perfect for documenting quality control issues and emailing images for co-worker inspection.

If you have a specific quality control microscope system or process you are trying to meet, contact Microscope World for a solution.

Cirrhosis of the Liver

$
0
0
The liver weighs about three pounds and is the largest solid organ in the body. The liver transports oxygen, manufactures blood proteins that aid in clotting, and aids in the body's immune system function. The liver stores excess nutrients and returns them back to the blood stream.

The liver produces bile required for food digestion and helps the body store sugar in the form of glycogen. It breaks down saturated fats and produces cholesterol. Harmful substances in the body such as alcohol or drugs are removed from the body by the liver.

Cirrhosis is a disease in which healthy liver tissue is replaced slowly with scar tissue, eventually damaging the liver from functioning properly. The scar tissue blocks the blood from properly flowing through the liver, and slows the process of nutrients, hormones, toxins, drugs and naturally produced toxins. Cirrhosis also slows the production of proteins and other substances made by the liver.

According to the National Institutes of Health, Cirrhosis of the liver is the twelfth leading cause of death by disease.

Hepatitis C, fatty liver and alcohol abuse are the most common causes of cirrhosis in the liver in the United States but anything that damages the liver can cause cirrhosis, such as obesity and Diabetes (fatty liver), viral infections of the liver, repeated heart attacks and certain inherited diseases.

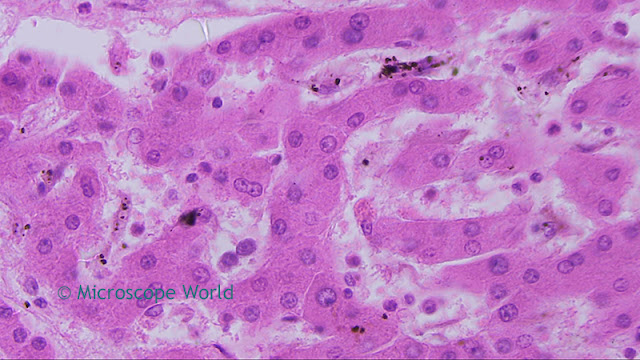
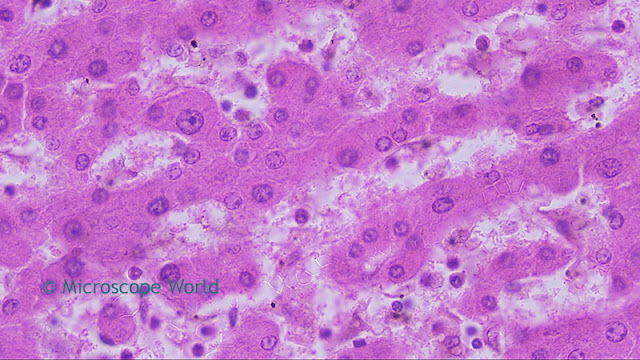
The images below of Cirrhosis of the liver were captured using the RB30 biological lab microscope and a microscopy USB camera at Microscope World.

Microscope World image of cirrhosis of the liver at 40x magnification.
Cirrhosis of the liver under the microscope at 40x.

Cirrhosis of the liver image captured at 100x magnification at Microscope World.
Cirrhosis of the liver under the microscope at 100x.

Cirrhosis of the liver captured at 400x by Microscope World.
Cirrhosis of the liver under the microscope at 400x.

Microscope World image of cirrhosis of the liver at 400x.
Cirrhosis of the liver under the microscope at 400x using a Plan Fluor Objective.

Microscope Condensers and Filters

$
0
0
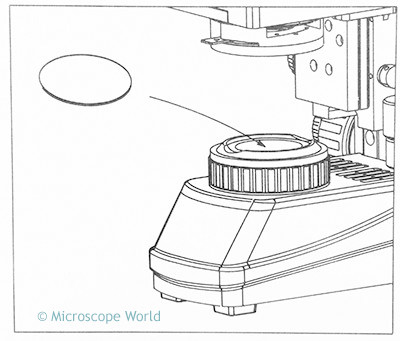
When using microscope filters or sliders with the microscope condenser, there are several locations the filters can be placed. Filters are often placed above the light source. For example, a blue or ground glass filter is often placed directly above the light, as shown in the image below. Visit this page for more information on the types of filters and their uses.

Where to place a microscope filter on a microscope.
Microscope Filter Above Light

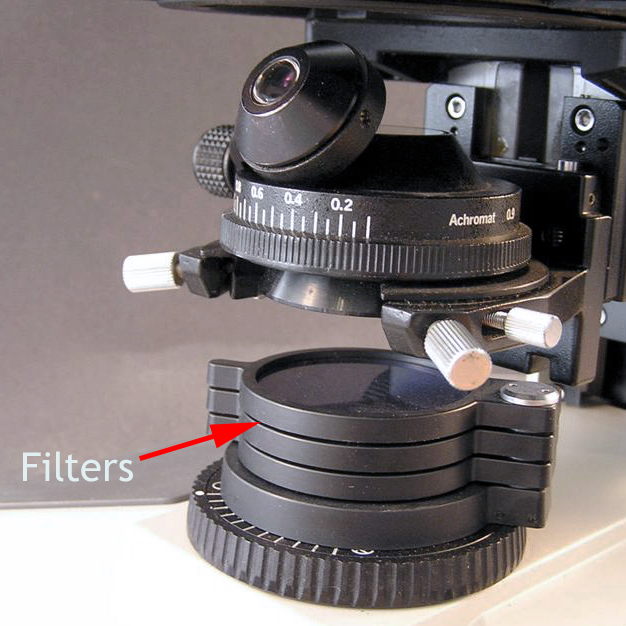
Often microscopes have built-in filter holders located above the light source that can be swung into place above the light or moved out of the way when not in use. The image below shows built-in filter holders that swing out of place.

Microscope image showing swing-out filter holders above the light source.
Microscope with Swing-Out Filter Holders

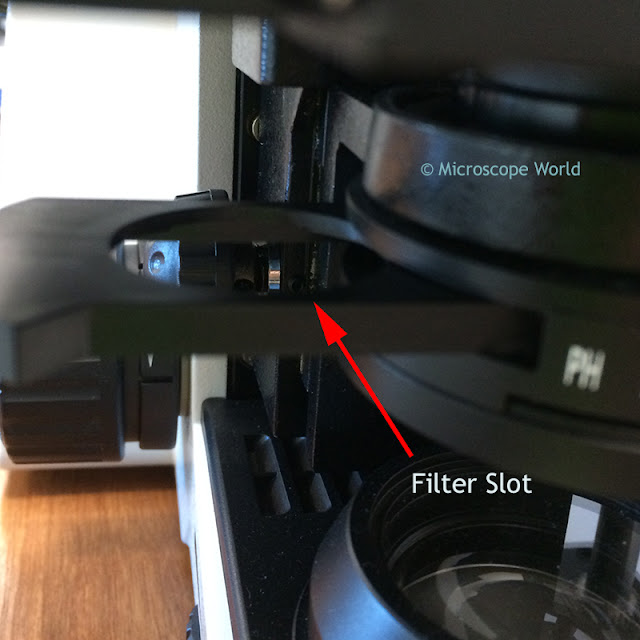
Other microscopes will have a filter holder that slides directly into the condenser. The image below of the biological microscope shows where the filter can be placed in the slider for insertion in the condenser. Additionally, this filter slider can be removed and a darkfield slider or a phase contrast slider can be inserted in this condenser.

Microscope condenser with filter slot.
Microscope Condenser with Filter Slot

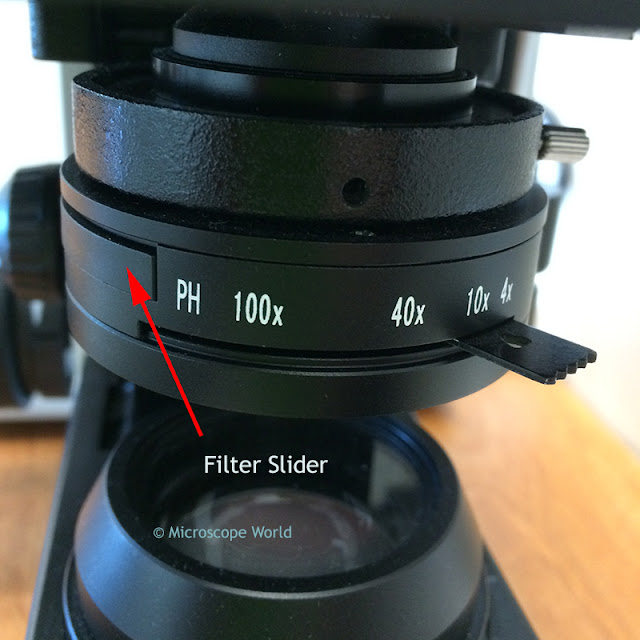
The final image below shows the same filter from above fully inserted into the microscope condenser.

Microscope condenser image with slider inserted.
Microscope Slider In Place on Condenser
If you have questions about microscope filters or microscope condensers, contact Microscope World.

Fibroadenoma of the Breast

$
0
0
A firboadenoma is a non-cancerous breast tumor that is most commonly found in women under age thirty. Fibroadenomas are diagnosed in about ten percent of all women in the United States. The tumors consist of breast tissue and connective (stromal) tissue. Fibroadenomas can occur in one or both breasts, but 85-90 percent of women only develop one tumor.

Some fibroadenomas are so small they can not be felt. Those that can be detected have a very distinct surrounding tissue. The edges are clearly defined and the tumor has a detectable shape. They are movable under the skin and are usually not tender. Fibroadenomas are often shaped like marbles with a rubbery feel to them.

The exact cause of fibroadenomas is unknown, but hormones such as estrogen may play a role in the development of the tumors. In addition, taking contraceptives before the age of twenty may be a cause of developing fibroadenomas. The tumors have also been known to grow during pregnancy and shrink during menopause and can sometimes resolve themselves.

There are two types of fibroadenomas: simple and complex.

The simple tumors look the same all over when viewed under the microscope, and they do not increase the risk of breast cancer. The complex tumors contain other components, such as macrocysts (fluid filled cysts large enough to see and feel without a microscope) and calcification (calcium deposits). This type of tumor slightly increases the risk of breast cancer by 1.5-2 times, compared to women without complex fibroadenomas according to the American Cancer Society.

The images below are of fibroadenoma of the breast and were captured using a biological lab microscope with a high definition microscopy camera.

Breast fibroadenoma under the microscope at 40x.
Fibroadenoma of the breast under the microscope at 40x.

Benign breast tumor under the microscope at 100x.
Fibroadenoma of the breast under the microscope at 100x.

Breast fibroadenoma captured under the microscope at 400x.
Fibroadenoma of the breast under the microscope at 400x.

Breast benign tumor under the microscope at 400x.
Fibroadenoma of the breast under the microscope at 400x.

Best Teaching Microscopes

$
0
0
Teachers have a variety of needs depending on the teaching environment. Below is a review of some of the best teaching microscope that provide different options to ultimately enable teachers to perform their job with a bit less hassle.

Student Microscopes

Most popular student high school microscope model HS-1M.
HS-1M Student Microscope
For the teacher who wants each student (or group of students) to have their own workstation with a basic biological microscope that provides 40x, 100x, and 400x magnification, the HS-1M Student Microscope is an inexpensive solution. The microscope has the option to add a mechanical stage. This microscope is the most popular high school model as it meets U.S. high school standards and provides both coarse and fine focusing adjustments, as well as having a cool LED light source that will not harm living specimens. The microscope can be operated corded by plugging in the included recharger, or cordless.


WiFi Wireless Teaching Microscopes

WiFi digital microscope that streams up to six devices at once.
Digital WiFi Microscope
The WiFi wireless teaching microscopes create their own WiFi network (you do not need another wireless network) that allows connection of up to six Android or Apple devices such as tablets or iPhones. A free app is downloaded on each device and live images can be streamed from the WiFi microscope directly to each device. The WiFi microscopes are available both as biological compound microscopes or stereo dissection microscopes. Rather than purchase a large number of microscopes, the WiFi microscopes can be used with multiple students at one time since each student can view the microscopy image on their personal device.


Tablet Microscopes

UX1-LCD tablet microscope with touch screen and image capture.
UX1-LCD Tablet Microscope
A tablet microscope provides a live image directly on the tablet attached to (or next to) the microscope. This LCD tablet microscope is a good teaching tool when it is easier to have a group of students gather around a single microscope rather than taking turns for each student to look through the eyepieces. Additionally, if a budget doesn't provide for multiple microscopes, a single digital tablet microscope can be a viable solution. The tablet microscope provides live images, the ability to capture and save images as well as capture to a micro SD card. The tablet microscopes also have WiFi capability that allows up to six users to connect to the microscope WiFi network and view live images on their own personal Android or Mac devices.


HDMI Video Microscope

The HD video microscope can connect with an HDMI cable directly to a monitor.
HD Video Microscope
An HDMI Video Microscope provides the ability to connect a teaching microscope directly with an HDMI cable to a monitor. This teaching microscope can simplify the microscope connection process. Rather than needing to take the digital microscopy image through a computer via USB and then having to connect the computer up to an LCD projector, the HDMI cable option provides one simple connection between the digital microscope and the video screen. The video microscope also allows for image capture either with an SD card or by connecting the microscope through the USB port on the computer.


Teaching and Multi-Viewer Microscopes

Dual head multi-viewer teaching microscope.
Dual Head Teaching Microscope
Dual-head multi-viewer teaching microscopes can have multiple viewing heads ranging from two to five. These multi-viewer microscopes allow each student to look through the microscope simultaneously. Multi-head teaching microscopes are typically used in Universities and for higher education.

Human Colon Under the Microscope

$
0
0
The human colon is an important part of the digestive system and it plays a critical role in maintaining a healthy body. The human colon is a continuous hollow tube that is approximately five feet long and about 2-3 inches in diameter. The colon is made up of four unique parts.

Human colon part #1:
The ascending colon is the portion of the colon located on the right side of the abdomen near the liver.

Human colon part #2:
The transverse colon is located near the liver and the spleen. It hangs from the stomach by a band of tissue called the greater omentum. The transverse colon is the part that has the greatest risk of developing cancer, because more of the solid waste is moved and stored in this area.

Human colon part #3:
The descending colon connects the sigmoid colon to the splenic flexure. The descending colon is located on the left side of the large intestine, extending from the bend below the spleen to the sigmoid colon. The descending colon stores the food to be emptied into the rectum.

Human colon part #4:
The sigmoid colon is located between the descending colon and the rectum. It has muscular walls that contract in order to increase the pressure in the colon to move the stool to the rectum.

While food is still in the small intestine, all the vital nutrients are removed and used by your body. The waste that is left, moves to the large intestine, which is the first part of the colon. Here, the colon absorbs water and sodium from the waste and what is left is referred to as stool. The stool passes through the colon into the rectum and out through the anus during a bowel movement.

The images below of the human colon were captured with a biological laboratory microscope and a high definition (HD) microscope camera.

Microscope World image of human colon at 40x under the microscope.
Human colon under a biological microscope at 40x.

Microscopy image of human colon captured at 100x.
Human colon under a biological microscope at 100x.

Microscopy image of the human colon at 400x.
Human colon under a biological microscope at 400x.

Human colon under the microscope at 400x.
Human colon under a biological microscope at 400x using a plan fluor objective lens.

You can view larger images of the human colon and its placement in the body here.

Heart Attack Awareness & Prevention

$
0
0
Myocardial infarction is the technical term for a heart attack. A heart attack occurs when an artery leading to the heart becomes completely blocked and the heart doesn't receive enough blood or oxygen. Without oxygen, cells in that area of the heart die, referred to as an infarct.

A heart attack is a medical emergency and if you or someone around you has the symptoms listed below call for medical help immediately. With prompt medical treatment, heart damage can be minimized. Waiting even ten minutes can be fatal. Although heart attacks are the leading cause of death in the United States, up to 95 percent of people who are hospitalized with a heart attack survive.

Signs and Symptoms of a heart attack:
  • Squeezing pain, heaviness, tightness and/or pressure in the chest.
  • Pain that spreads to the back, left arm, jaw and/or back.
  • Shortness of breath, weakness, dizziness, nausea, vomiting, and sweating.
  • Irregular heartbeat or a feeling of doom.
  • Women may also experience: heartburn and/or abdomen pain, unusual fatigue and/or clammy skin.
Most heart attacks are caused by blood clots, which are caused by atherosclerosis (stiffening and narrowing of the arteries). High blood fats, known as triglycerides, and LDL (bad) cholesterol form plaque inside arteries, narrowing the passageway and reducing the amount of blood that can flow through the arteries.

A healthy lifestyle is the best preventative medicine and these changes can reduce the risk of heart attack:
  • Eating a heart-healthy diet low in cholesterol and high in fruits and vegetables.
  • Exercising at least thirty minutes a day, five or more days a week.
  • Reducing stress levels.
The images below are of myocardial infarction (a heart that has been through a heart attack) and were captured using a clinical lab microscope and an HD microscopy camera.

Microscope World image of myocardial infarction under the microscope at 40x.
Myocardial infarction (heart attack) under the microscope at 40x.

Microscope World image of heart attack under the microscope at 100x.
Myocardial infarction (heart attack) under the microscope at 100x.

Microscopy image of a heart attack (myocardial infarction) under the microscope at 400x.
Myocardial infarction (heart attack) under the microscope at 400x.

Myocardial infarction (heart attack) under the microscope at 400x with Plan Fluor objective lens.

For more info on microscopes and microscopy cameras contact Microscope World. For more info on heart attack prevention and awareness visit NIH here.
Viewing all 422 articles
Browse latest View live