Quantcast
Channel: Microscope World Blog
Viewing all 422 articles
Browse latest View live

Kids Science Project: What is in the Water?

$
0
0
Water can be swimming with a variety of different creatures. This kids science project is fun and easy to do at home or school. First, gather your supplies:
Collect several small jars of water from a local pond, the ocean, your local pool, your sink and if possible, a muddy marsh. Label each jar of water and put the date you collected the water on the jar.

Student microscope
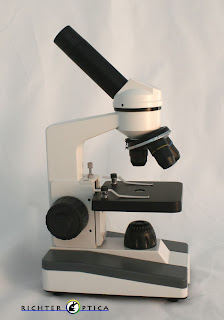
F1 Student Microscope
Set up the microscope and make sure you start using the lowest magnification of 40x. Place a small drop of water on your depression slide and put a cover slip on top. Once you have the slide under the microscope you may need to move it around a bit in order to view the sample. Once you have the slide in focus at 40x, move up to 100x and 400x magnification, where you will be able to view bacteria or creatures swimming in the water.

Not sure what you see?
Here are a few examples of creatures or microorganisms that you might view under your microscope.
  • Protozoa - these have a tail (called flagella) that can sometimes be hard to see.
  • Euglenas - these are found and fresh water and salt water and typically look like long, somewhat round tubes with a flagella (tail). They are often green in color.
  • Amoeba - microorganisms that are a genus of Protozoa. Amoeba move with false feet and they surround their food in order to eat it.
  • Algae - usually yellow, green or red, algae are sometimes found in chains.
  • Bacteria - these are typically rod shaped.
  • Worms - depending how mucky the water was where you found your water, you might even have some small worms moving around in your water.
If you have a microscope camera, capture images to share with your class or so you can compare your findings with future research. If you don't have a microscope camera, draw a few sketches of the organisms you found in your water.

Which type of water had the most organisms? Did you find any surprise creatures?

Blue Green Algae captured under the microscope, 100x.

Human Larynx Fluorescence Microscopy

Polarizing Microscope Slide Preparation Tips

$
0
0
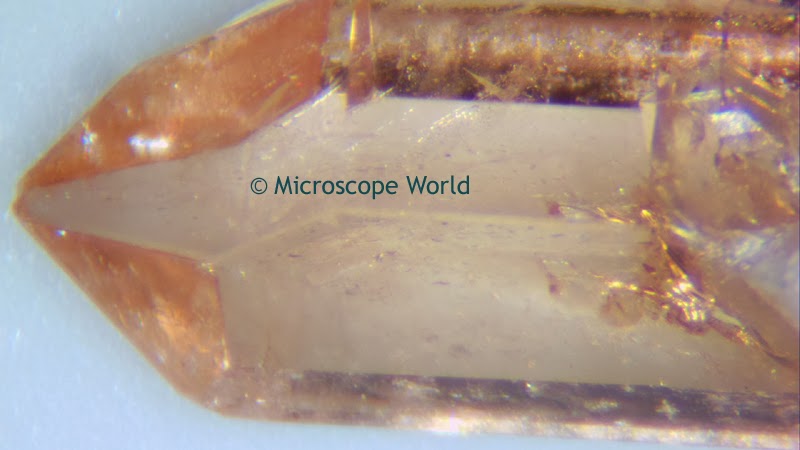
Polarizing microscopes are used to look at thin sections of rocks and minerals. It is very important when using a polarizing microscope that the thickness of the sample is correct in order for the light to shine through the specimen properly and produce a high quality image. Polarization requires accurate measurements involving light intensity, patterns and colors and therefore specimen thickness is probably the most important factor when preparing samples.

Adequate transparency for identification of minerals requires a section that is 0.02mm - 0.03mm thick. For materials where only structure is of interest, sections may be as thick as 0.25mm or more.

Both grains and thin sections are examined under a polarizing microscope and it is frequently important to know the refractive index of the mounting medium. In the majority of cases with grains, it is more efficient to mount grains with oils. Temperature effects on refractive index determinations are great and any exact statement regarding refractive index must include the temperature at which it was determined. If temperature changes are accompanied by changes in chemical composition, optical properties may change as well.

Platy minerals such as mica or other minerals in grain form are more difficult to manipulate under a cover slip and will not roll over well. It can be helpful to mix a little powdered glass with the mineral or grains in order to separate the cover slip and the sample and allow the platy material to move and turn over freely.

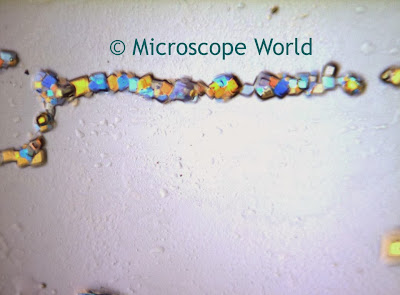
polarizing microscope image of litric acid
Litric Acid captured at 400x under the MT9300 Polarizing Microscope

Spirogyra under the Microscope

$
0
0
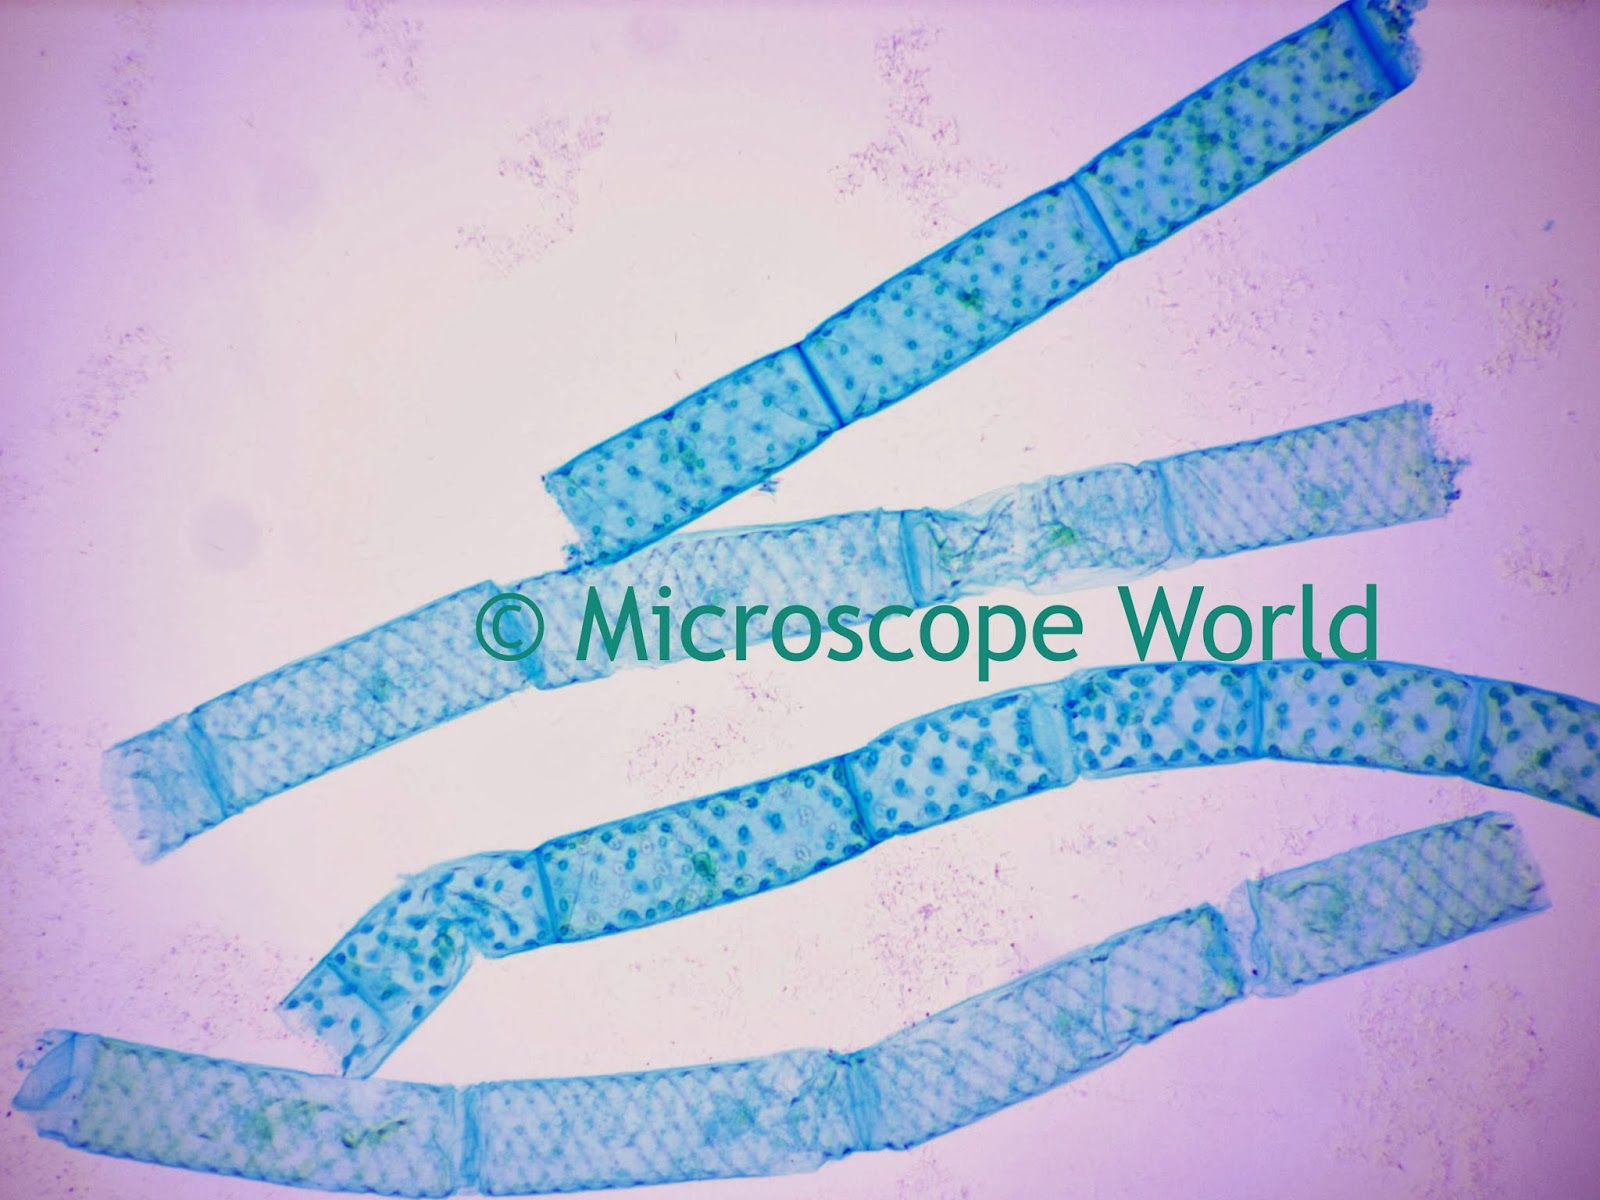
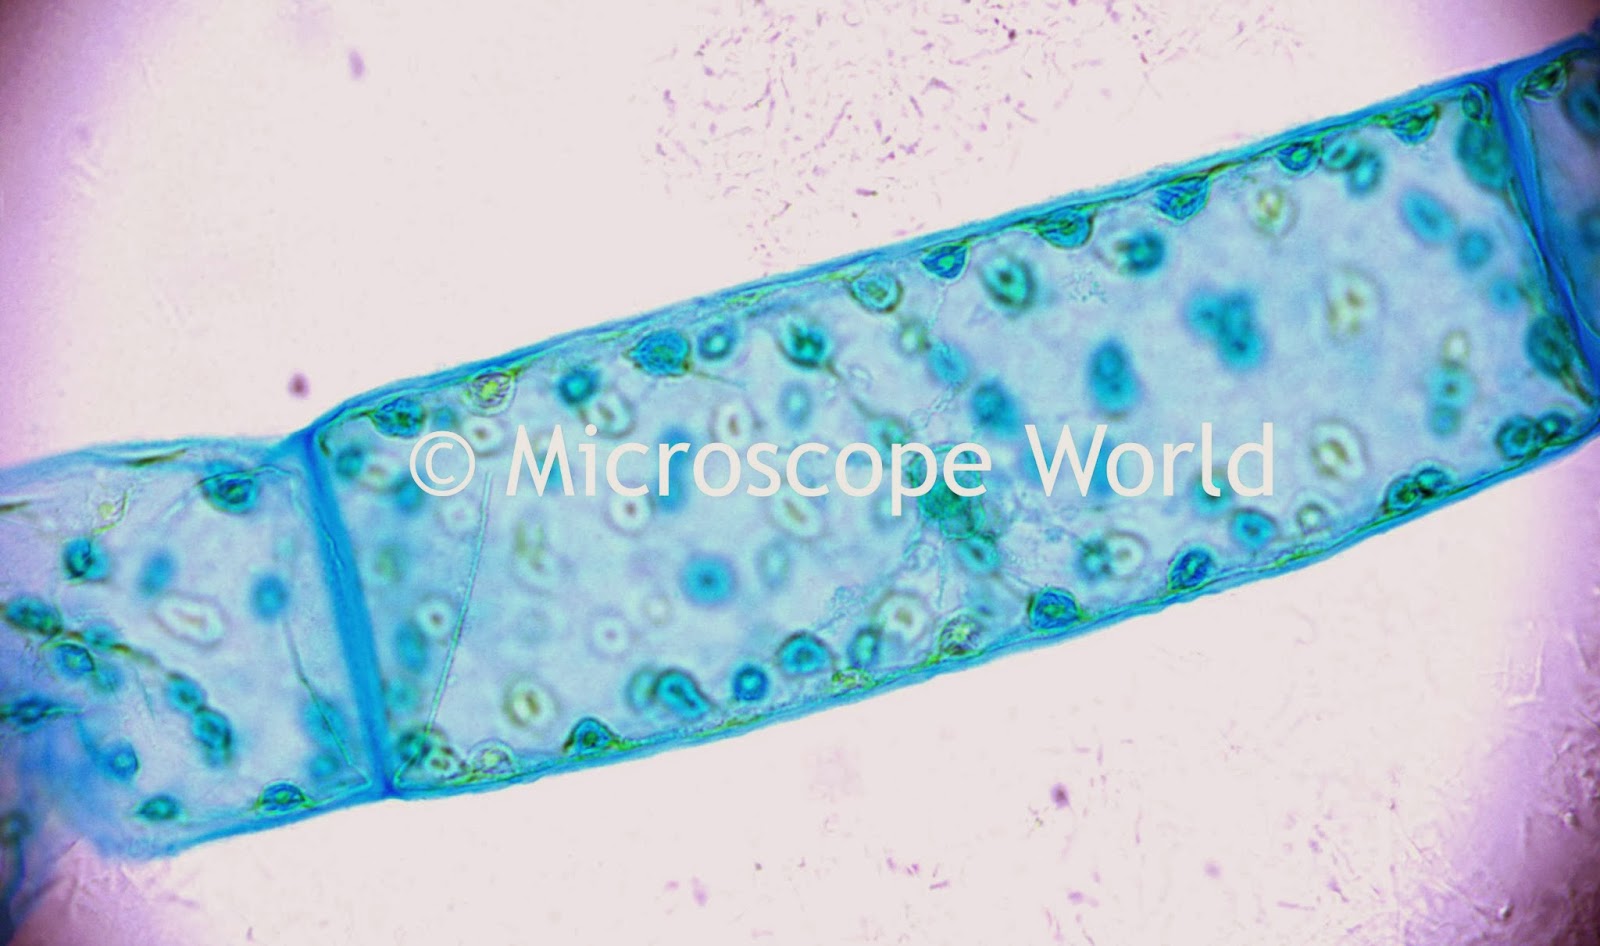
Spirogyra is a genus of green algae of the order Zygnematales. Spirogyra have a sprial arrangement of chloroplasts and are commonly found in fresh water ponds. The cell wall of Spirogyra has two layers - the outer wall is composed of pectin that dissolves in water to make the filament slimy to touch while the inner wall is made up of cellulose. The chloroplasts are ribbon shaped and usually arranged spirally, which results in the prominent characteristic green spiral on each filament.

Spirogyra 100x
Spirogyra captured under the microscope at 100x.
In the springtime Spirogyra grows under water, but when there is more sunlight and warmth, Spirogyra produce large amounts of oxygen that adhere as bubbles among the tangled filaments. These masses of Spirogyra come to the surface and become visible as a slimy green mat.

Spirogyra 400x
Spirogyra captured at 400x using the U2 biological microscope.
This Spirogyra prepared slide is available in the botany prepared slide kit. Images were captured using the U2 biological microscope and the 5mp microscope camera.

Spirogyra prepared slide captured at 400x under a biological microscope.

Live Blood Cells under Microscope

What Grows in Murky Pool Water

$
0
0
If a pool is left unattended in the winter months, the water turns into murky pond water. But what exactly can be found in this water? Microscope World recently got a sample of some murky pool water and put it under a Motic BA310 microscope to see what types of creatures were swimming around.

dirty pool image
Dirty pool water.

Ciliates (Protozoans) found under the microscope.
The small pointed rod-shaped items are Ciliates, a group of Protozoans characterized by the presence of hair-like organelles called cilia on them. The image above was captured using a 2 mega pixel  monochrome Lumenera Infinity 2-2 CCD microscope camera.

Microscope Immersion Oil

$
0
0
If you look closely at the 100x objective lens on a light microscope, you will usually find the word "OIL" written on the lens. This inscription means that the microscope lens is an immersion oil objective lens and the best results will be obtained using immersion oil.

100x immersion oil microscope lens
Immersion Oil Microscope Lens
Immersion oil is placed between the top of the cover slip and the bottom of the 100x oil lens, essentially sealing out any air between the specimen and the microscope objective lens.

These images of frogs blood were captured using a 3mp microscope camera and the U2 biological microscope. One image was captured without any immersion oil, the other image was captured using immersion oil.

Frogs blood no immersion oil 1000x
Frogs blood, 1000x magnification, no immersion oil used.
immersion oil 1000x frogs blood
Frogs blood, 1000x magnification, using immersion oil.
Notice the difference in clarity between the two images that were captured at 1000x magnification. Once you have finished using the microscope with the immersion oil. Be sure to clean off the objective lens so the immersion oil does not harden on it.

Human Hair at 500x

$
0
0
This single strand of human hair was captured under a metallurgical microscope at 500x magnification using a 3mp microscope camera.

Metallurgical microscope image of human hair at 500x
Human hair, 500x magnification.

hair under microscope at 500x
Human Hair, 500x magnification.
Notice the scales of the fibers that hold bind the single strand of hair together.

Ciliates Swimming in Pond Water

Microcope Sample Characterization by Light

$
0
0
Light behavior is revealed in different forms including reflection, refraction, dispersion, diffraction, interference, absorption, polarization and excitation. Each of these forms are described in detail below and provide a basis for understanding the various specimen characterization methods by light action with the microscope.

Reflection:

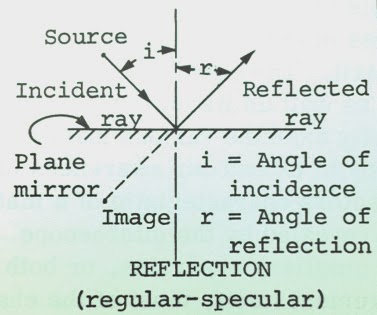
Reflection of light from a smooth surface (such as a mirror), takes place along a definite direction determined by the direction of the incident ray, and is called regular or specular reflection. Reflection from a rough or matte surface occurs in many directions and the incident beam is said to be "diffused" or "scattered". Non-luminous objects become visible by diffused reflection.

light reflection illustration
Light reflection from a smooth surface.

light reflection from a rough surface
Light reflection from a rough surface.

Refraction:

A ray of light of a single wavelength  undergoes an abrupt change of direction upon passing obliquely from one medium to another. The effects of refraction are responsible for a variety of familiar phenomena, such as the apparent bending of an object that is partially submerged in water and the mirages observed on a dry, sandy desert. The refraction of visible light is also an important characteristic of microscope lenses that enables them to focus a beam of light onto a single point.

light refraction
Light refraction


Dispersion:

The spreading out of light into its component colors is known as dispersion. For example, when a narrow slit is illuminated by white light which is then passed through a prism, refraction takes place and the constituent colors are spread out into an array called a spectrum.

ligh dispersion image
Light Dispersion

Diffraction:

Light bends slightly around edges when it is obstructed. The spreading of a beam of light into the region behind an obstacle is known as diffraction. When we view a specimen, whether directly or with a microscope, the image seen is composed of a myriad of overlapping points of light emanating from the plane of the specimen. Therefore, the appearance and integrity of the image from a single point of light holds a significant amount of importance with regards to formation of the overall image. Because the image-forming light rays are diffracted, a single point of light is never really seen as a point in the microscope, but rather as a diffraction pattern containing a central disk or spot of light having a finite diameter and encircled by a fading series of rings. As a result, the image of a specimen is never an exact representation of the specimen, and a lower limit is imposed on the smallest detail in the specimen that can be resolved.

light diffraction illustration
Light Diffraction


Interference:

The colors produced by the interference of light waves at the front and back surfaces of very thin films are observed by reflection. Some natural substances have the property of double refraction, such as quartz, calcite and mica. Man-made devices such as diffraction gratings and others are often employed to produce interference effects. The phenomena of interference, like most of the other properties of light, are used in microscopy both as a tool to investigate object materials, or the phenomena produced naturally by the object material are interpreted as a characteristic.

Absorption:

The amount of light that is reflected from a transparent substance depends on the angle of incidence and the refractive index of the substance. At perpendicular incidence of a light beam only a part is reflected, the rest is being absorbed and transmitted. The amount of light absorbed depends on its thickness and the nature of the specimen. Absorption means the conversion of electromagnetic energy to heat energy.

absorption image illustration
Absorption

Polarization:

Polarized light is used as a tool or is interpreted as an object characteristic. Light vibrations restricted to a single plane are said to be plane-polarized. Polarized light microscopy is a useful method to generate contrast in birefringent specimens. The beautiful variety of colors displayed by specimens under crossed polarizers is a result of the interference between light waves passing through the specimen.

Excitation:

Certain substances when exposed to or excited by light continue to emit light a fraction of a second after removal of the exciting source. This property of a substance is known as fluorescence. Microscopic samples are excited with a fluorescence microscope. Fluorescence is a very powerful analytical tool in light microscopy.

Source: McLaughlin, Robert. Special Methods in Light Microscopy. London: Microscope Publications Ltd., 1977. Print.

Gems under the Microscope

The Features of a Polarizing Microscope

$
0
0
Polarizing microscopes are used to view minerals, drugs, chemicals, rocks and geological particles. But what exactly makes a polarizing microscope different from a biological microscope?

polarizing microscope
Meiji Polarizing Microscope MT9200
polarizing microscope lenses
Polarizing microscope lens slots.
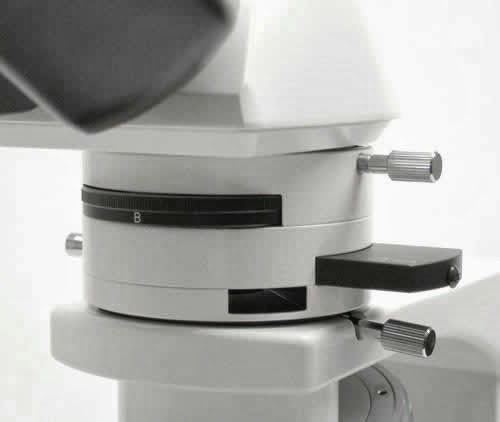
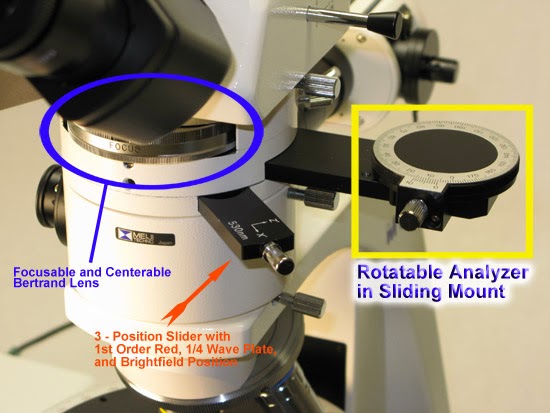
  • Below the eyepieces in the body of the polarizing microscope is the Bertrand Lens, which can be swung out or slid in and out of the axis tube. The Bertrand Lens is used to analyze the back focal plane of the objective.
polarizing microscope features
Polarizing Microscope Features
  • The analyzer rotates at least 90°.
  • The 1/4 Wave Plate or Quartz Wedge is used for analytical work. 
  • Compensator and Retardation Plates are included in many polarized light microscopes with a slot to allow the insertion of compensators and/or retardation plates in between the crossed polarizers. These are used to enhance optical path differences in the specimen.
  • Strain Free objectives and a strain free condenser are used, which contain anti-reflection on the glass parts. The strain-free design precludes the setting up of mechanical stresses in the glass elements by special glass selection and/or construction of lens mounts. The anti-reflection films enhance image contrast and reduce possible disturbing interference patterns at the glass-air interfaces.
  • The substage contains the condenser, iris diaphragm, carrier for a polarizer, and sometimes an additional carrier for a sensitive tint plate.
strain free microscope condenser
Polarizing microscope strain-free condenser.
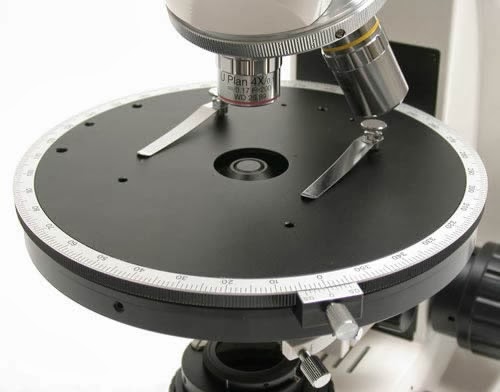
  • The rotating stage is graduated in degrees. A vernier is included to permit reading of angles to the nearest tenth degree.
polarizing microscope stage
Polarizing microscope stage.
Polarized light microscopy is capable of providing information on absorption color and optical path boundaries between minerals of differing refractive indices. Contrast-enhancing techniques reveal detailed information concerning the structure and composition of materials that are very useful for identification and diagnostic purposes.

    Mold Under the Microscope

    $
    0
    0
    Mold is a fungus that grows in multi-cellular (often tubular shaped) filaments resulting in discoloration and sometimes a fuzzy appearance on whatever it grows on. Molds cause biodegradation of natural materials. Mold also plays an important role in biotechnology and food science in the production of various foods, beverages, antibiotics and pharmaceutical products.

    Mold captured under the microscope
    100x magnification - mold captured under the U2 microscope.
    There are thousands of kinds of mold. The ones shown here are Aspergillus. This specific prepared slide is available to view under the microscope in the Botany Prepared Slide Kit.

    Aspergillus (mold) under the microscope
    400x magnification - mold captured under the U2 LCD digital microscope.
    Images were captured using the Richter Optica U2 biological microscope with the DCM5.1 5mp microscope camera and the Richter Optica U2 LCD digital tablet camera microscope.

    Microscope World image of mold captured under the microscope.
    400x magnification - Aspergillus (mold) under the microscope.

    10 Fun Facts on History of Microscope

    Happy Valentines Day!


    Moss Under the Microscope

    $
    0
    0
    Moss typically grow close together in shady, damp locations. Moss is a small, non-vascular plant that absorbs water and nutrients from its leaves, while sunlight is harvested to create food by photosynthesis. The moss images below were captured at 400x magnification using the Richter Optica U2 biological microscope.

    Moss captured under the U2 microscope
    Moss captured under the microscope at 400x.

    Images were captured using a 5 megapixel microscope camera with software. The USB microscope camera provides a live image from the microscope onto the computer. The software can be used to add notes to images, make measurements and even capture video.

    The moss prepared slide is part of the Botany Prepared Slide kit and can be purchased here.


    Moss under microscope 400x
    Moss captured under the U2 microscope at 400x.
    Moss under the microscope
    Moss under microscope, 400x magnification
    Moss captured at 400x
    Moss under the microscope at 400x.

    Physician Laboratory Microscopes

    $
    0
    0
    Physicians use microscopes for dermatology, histology, hematology and microbiology. Depending on the application, phase contrast might be used. High quality optics are a prerequisite. A few common laboratory microscopes used by doctors include the Meiji MT5300 and the Motic BA310.

    phase contrast microscope image
    Motic BA410 microscope set up for phase contrast.
    Microscope World has a specific physician microscope page on our website with the most commonly purchased laboratory physician microscopes.

    Histology image captured with physician lab microscope.
    If you are a lab or a doctor looking for a specific microscope setup, please contact Microscope World for a customized quote.

    How to Parfocal Microscope Objective Lenses

    $
    0
    0
    Microscope World has a full page dedicated information on how to parfocal microscope objective lenses here.

    A parfocalled microscope objective lens means that on a biological microscope when you move up in magnification from one objective lens to the next the specimen remains in focus.

    If you have a microscope objective lens that is not in focus when the other lenses are, you can adjust the lens by following these steps:

    Remove the objective lens from the microscope.

    Unscrew and remove the outer covering from the lens.

    Once the cover is removed, you will notice a small screw that, when tightened or loosened, will adjust the distance between the tip of the lens and the threads on the top of the lens.

    With the cover still removed, screw the objective lens back onto the microscope. Move down to the lower objective lens power and ensure that the objective is in focus when looking through the eyepieces. Move back to the lens that needs to be parfocalled. Rather than turning the focus knob to focus the lens, adjust the small screw on the side of the lens until the image is crisp and clear.

    Remove the microscope objective from the microscope, replace the metal cover on the lens and screw the lens back into place on the microscope. Learn more about how to parfocal microscope objective lenses here.

    Kids Science: Dollar Bill Under the Microscope

    $
    0
    0
    A great kids microscope project involves using a stereo microscope at anywhere from 10x-40x magnification to view a single dollar bill. How many hidden items can you find on a dollar bill? Here are a few fun facts about the US Dollar.

    If you place a dollar bill with a frayed edge under the stereo microscope at a higher magnification, you might be able to see the linen fibers of the bill. A dollar bill is made out of a blend of linen and cotton and this is why if you accidentally jump in the pool with money in your pocket, the dollars survive the washing. Look closely with the microscope - there are actually red and blue silk fibers woven throughout the bill.

    On the face of the dollar bill you will see a large letter inside a circle and a number off to the side of this letter. The seal with the large letter tells you the Federal Reserve bank that placed the order for the dollar bill. A = Boston, B = New York City, C = Philadelphia, D = Cleveland, E = Richmond, VA, F = Atlanta, G = Chicago, H = St. Louis, I = Minneapolis, J = Kansas City, K = Dallas, and L = San Francisco.

    The letter on the dollar bill tells which Federal Reserve Bank placed the order.
    The number to the left of the large letter corresponds to that specific letter placement in the alphabet. For example, "F" is the 6th letter in the alphabet. The letter "D" has a 4 next to it.

    What is hiding in the corner of this shield?
    Take a look at the shield behind the 1 in the corner of the dollar bill. Can you see a small spider or an owl?

    Find the Great Seal of the United States on the bill. Do you know that the founding fathers of America approved this design in 1782? Ben Franklin, John Adams and Thomas Jefferson all were involved in the design.

    Find the words Annuit Coeptis. Do you know what this means? The first of three Latin phrases on the back of the dollar bill are translated "God has favored our undertakings."

    The Great Seal of the United States
    Under the pyramid do you see some Roman numerals? Look closely with your microscope. The letters MDCCLXXVI stand for 1776, the year the Declaration of Independence was signed. M = 1000, D = 500, CC = 200, L = 50, XX = 20, VI = 6. If you add them all together you get 1776.

    What else can you find on the dollar bill when looking at it under the microscope? Whose signatures are on the bill? What items do you think were used to keep counterfeit money from being made?

    Human Esophagus Under the Microscope

    $
    0
    0
    The human esophagus is a muscular tube that connects the throat with the stomach. At about eight inches in length, it is lined with a moist tissue called mucosa. The esophagus' primary purpose is to pass food from the mouth to the stomach.

    Human esophagus 100x under the microscope.
    Human esophagus at 100x magnification under the microscope.

    These first two images of the human esophagus were captured using the Richter Optica U2 biological microscope and a 5mp CMOS microscope camera. Both were captured using brightfield with magnification at 100x and 400x.

    Human esophagus 100x under microscope
    Human esophagus under brightfield microscope at 400x.
    Using an Epi-Fluorescence microscope, the following image was captured at 400x magnification. Notice that the human esophagus prepared slide is in the exact same position as the image captured above.

    Human esophagus 400x epi fluorescence
    Human esophagus under an epi fluorescent microscope at 400x.
    The human esophagus prepared slide can be purchased in the Histology: Human Organ prepared slide kit from Microscope World.
    Viewing all 422 articles
    Browse latest View live